Setting up your Catalog allows you to create the products you sell and organize them all in one place. In the Catalog app you can group by category, making your products easy to access and add extras like fees, taxes, and discounts.
While creating your Catalog requires a bit of time to set up, the time you and your employees save will help you take full advantage of your smart terminal’s potential.
Create a Catalog
Start by naming your Catalog.
Some merchants use just one Catalog to store all of the items they sell. Others, especially restaurants, may have different several Catalogs for different ordering stations such as “Bakery” or “Grill”.
Whatever you have selected as your prominent Catalog will be the active Catalog in the Register App.

NOTE: There can only be one catalog assigned to the Register app at one time. To choose between different catalogs, you must reassign the new catalog to the Terminal in the Catalog app.
Grouping into Category
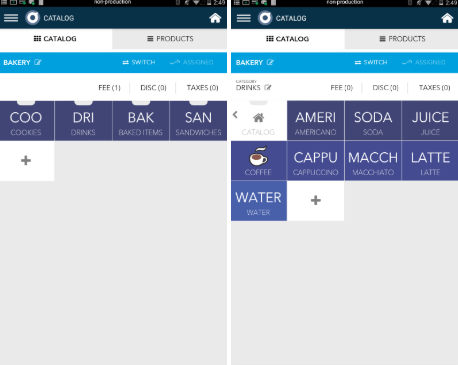
Group your products by category for quick reference when assisting customers and helpful reporting. Some common categories include Sandwiches, Cookies, Drinks, etc. You can also update or delete a category as your business changes.
Step 1: Go to the Catalog app and click on the category to be updated/deleted
Step 2: Click on the catalog name
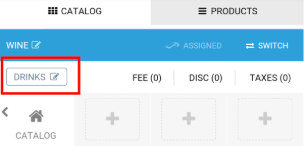
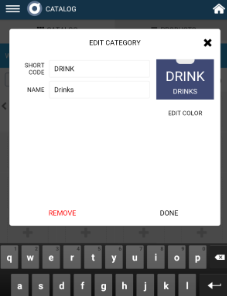
Step 3: Update the short code, name, or icon, and press Done to return to the previous screen. To delete, click on the REMOVE button on the bottom left hand side.
Applying fees, discounts, taxes
Fees, discounts, and taxes can be added to a Catalog for quick access when building an order on the Register App. These can be applied to a specific product (item-level) or to the entire order. These may be configured into a fixed amount or a percentage.
Create Products
Products on the terminal are intended to reflect the items you sell in your store. You can simply add a name and price and your product is all set to go.
Additionally, you can add SKUs for inventory management, edit the hot key color, and add modifiers.
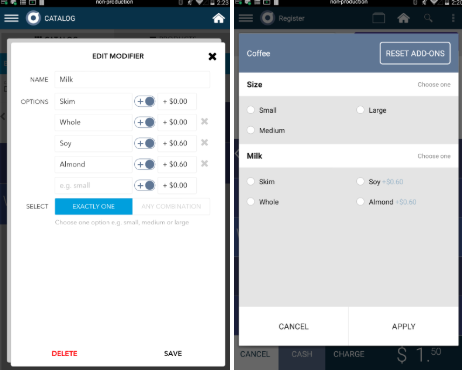
Adding Modifiers
Modifiers are options that add another level of specifications to a product. For example, under the product “coffee” there could be the modifier “size”. Pricing for specific modifiers can be added as well.
Assigning your Catalog
To use a Catalog as a default for Register app you must assign the Catalog to your terminal.
In the Catalog app, tap Switch and select the Catalog that you’d like displayed. Then, once displayed, the icon “Assign” will be next to the Switch button. Tap Assign.
NOTE: There can only be one catalog assigned to the Register app at one time. To choose between different catalogs, you must reassign the new catalog to the Terminal in the Catalog app.
Rearranging your Products
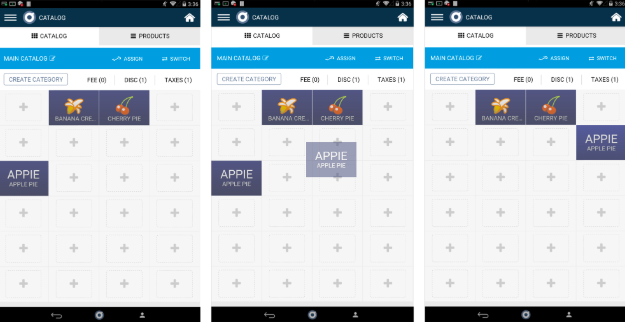
You can customize the location of their products on the Catalog app by with a simple drag-and-drop of the tile for quick selection in the Register app. Organize like-products or best sellers so you and your employees can find them quickly.
