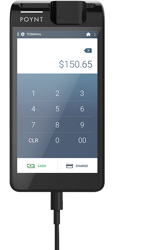
The Poynt 5, a smaller payment device running Poynt OS, is ideal for merchants who love to pay-at-the-table, busting lines, and accepting payments on the move.
The Poynt 5 device has a single screen - specially optimized to support both the merchant and customer.
In this article, we’ll cover the hardware basics and some minor software differences between experiences on the Poynt 5 and the Poynt Smart Terminal:
- Activating the Poynt 5
- Unboxing the Poynt 5
- Charging the Poynt 5
- Powering on the Poynt 5
- Placing the Poynt 5
- Connecting the Poynt 5
- Accessing your Notifications and Settings on the Poynt 5
- Processing a payment with the Poynt 5
Activating the Poynt 5
Your Poynt 5 is on the way!
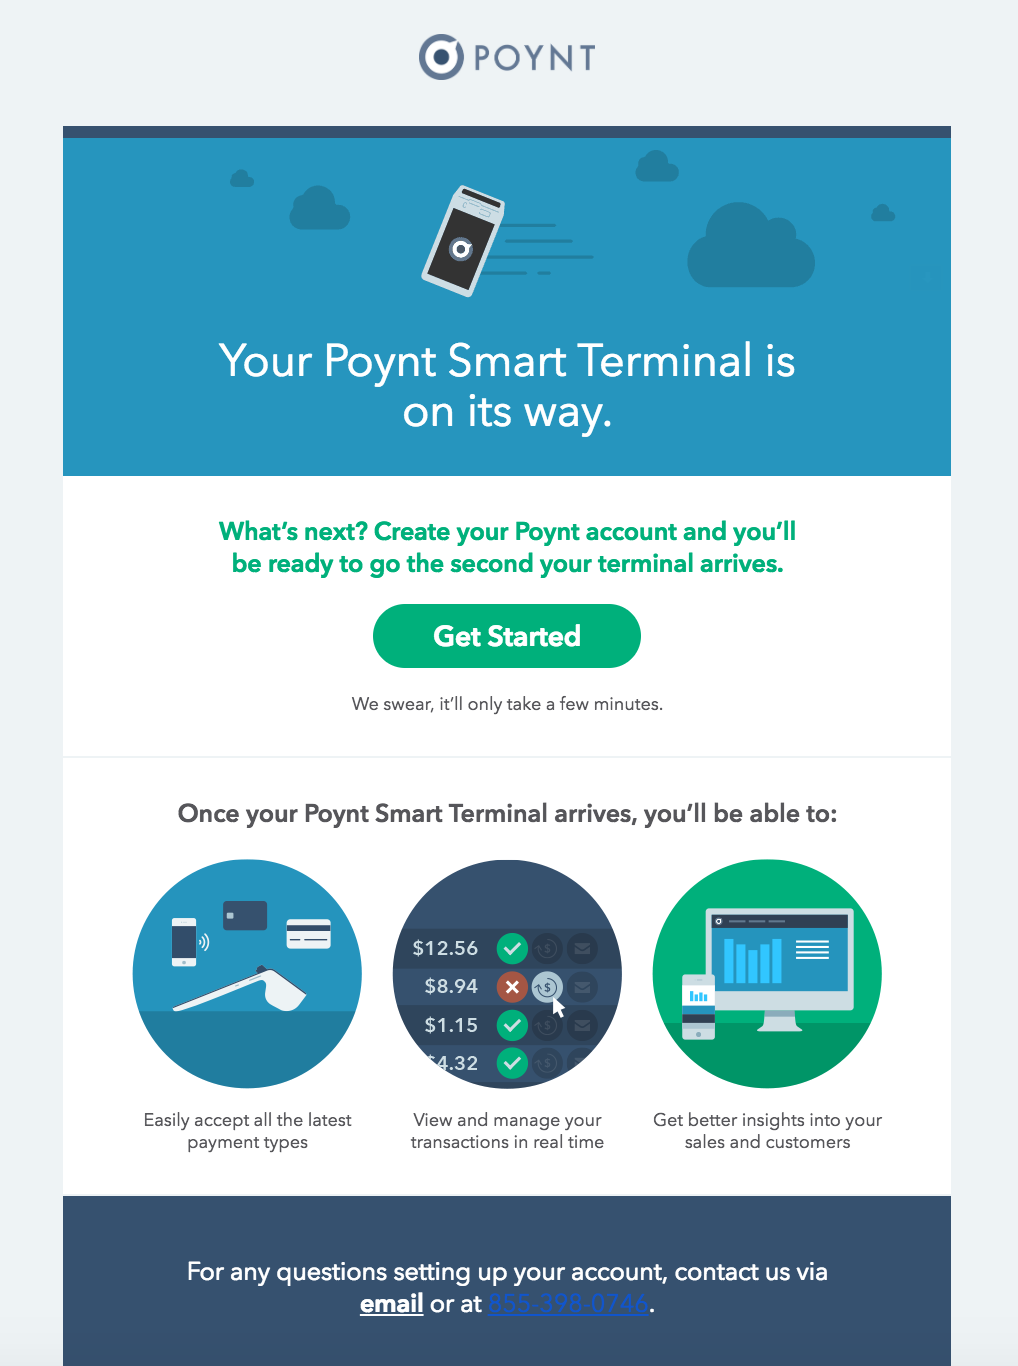
After placing your Poynt 5 order, you will receive the email above with instructions on how to prepare for your Poynt 5 to arrive.
While you’re waiting, here are some steps you can do to prepare:
Step 1: Set up your Poynt Web Portal account. Open your welcome email and click “Get Started” to create your login credentials.
Step 2: Log in at Poynt.net to view your dashboard. Once your terminal arrives, this is where you’ll be able to see your real-time customer and transaction data.
Step 3: Visit the Poynt Help Center to review helpful video tutorials and support articles.
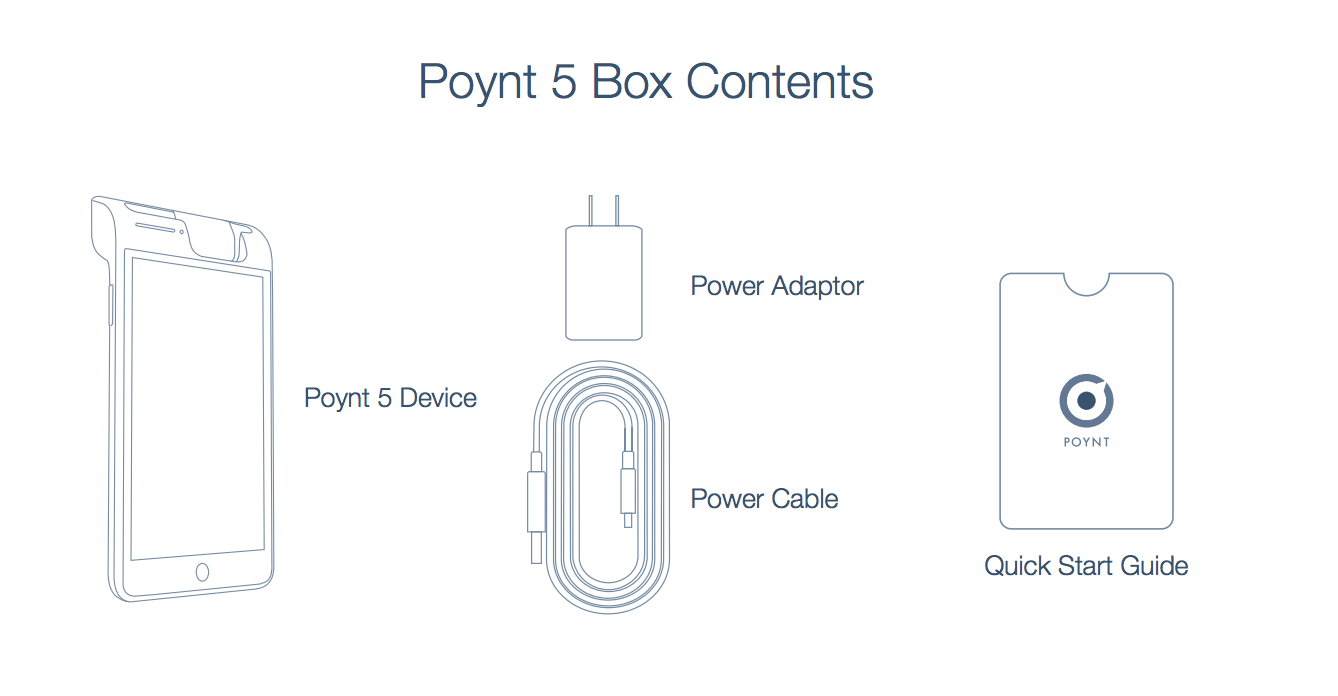
Unboxing the Poynt 5
Once your Poynt 5 box arrives it should contain the items below. In the following sections, we’ll cover what you should do with each of these.
Charging the Poynt 5
Using the included power adapter and USB cable, plug in your Poynt 5 to charge. The smaller end of the cable should be inserted at the bottom of the device just underneath the
Home button. This is reversible so it doesn’t matter how you spin it.
Powering on your Poynt 5
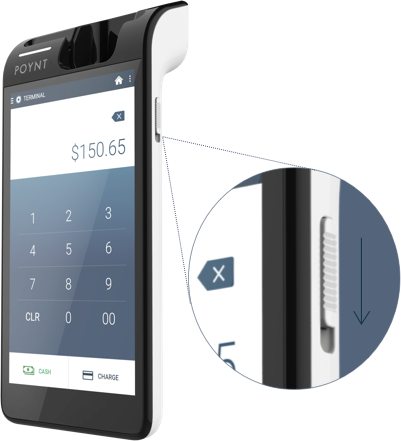
To power on your Poynt 5, slide down the springed button on the right-hand side of the device toward the bottom of the device.
Placing your Poynt 5

The Poynt 5 device fits in the palm of your hand so you have the freedom to transact wherever your customers are.
Connecting your Poynt 5
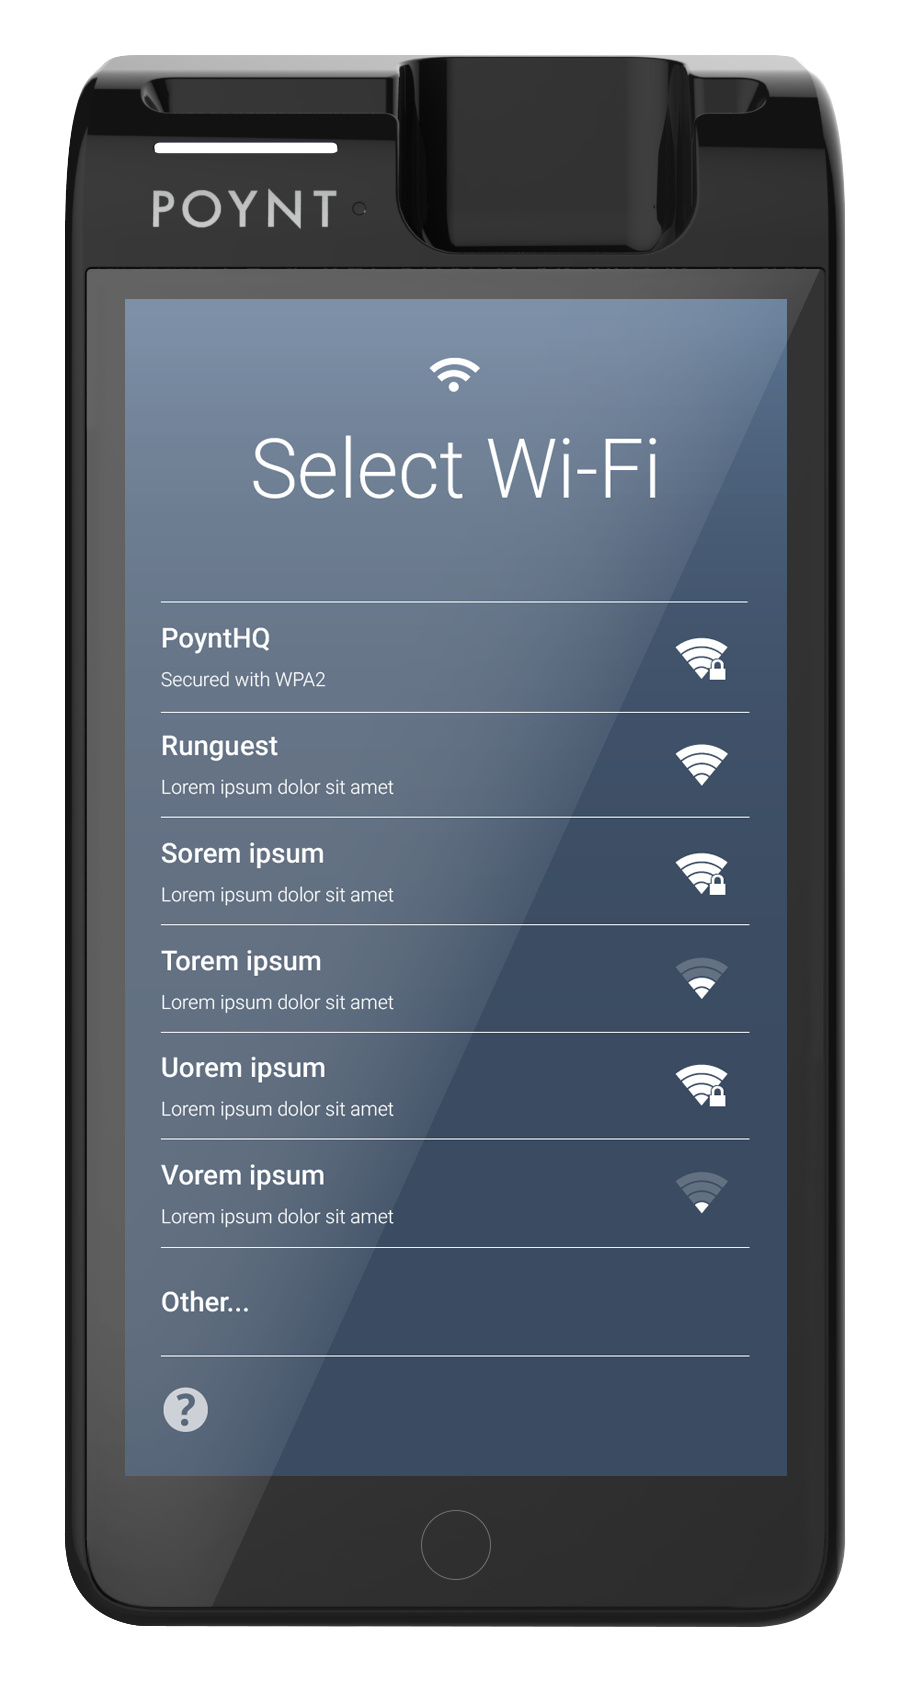
Your device will walk you through connecting to the internet via WiFi the first time you turn it on. After connecting, it may begin to update its software as required. This can take a few minutes. Allow the device to download, install, and reboot before getting started.
Accessing your Notifications and Settings
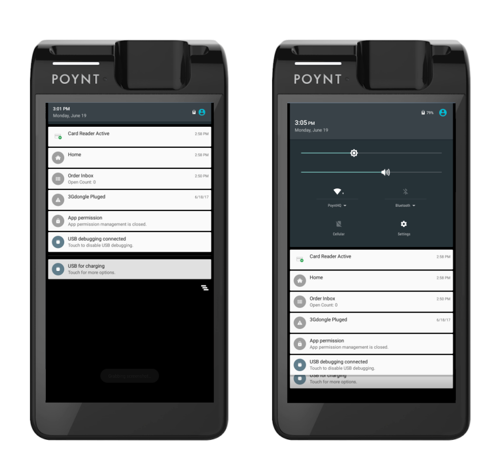
To access Notifications on your device, as well as adjust any settings, simply swipe down from the top from anywhere on the device. With one swipe, you’ll see a notifications tray. With a secondary swipe you’ll be able to quickly adjust brightness and volume and make additional adjustments within Settings.
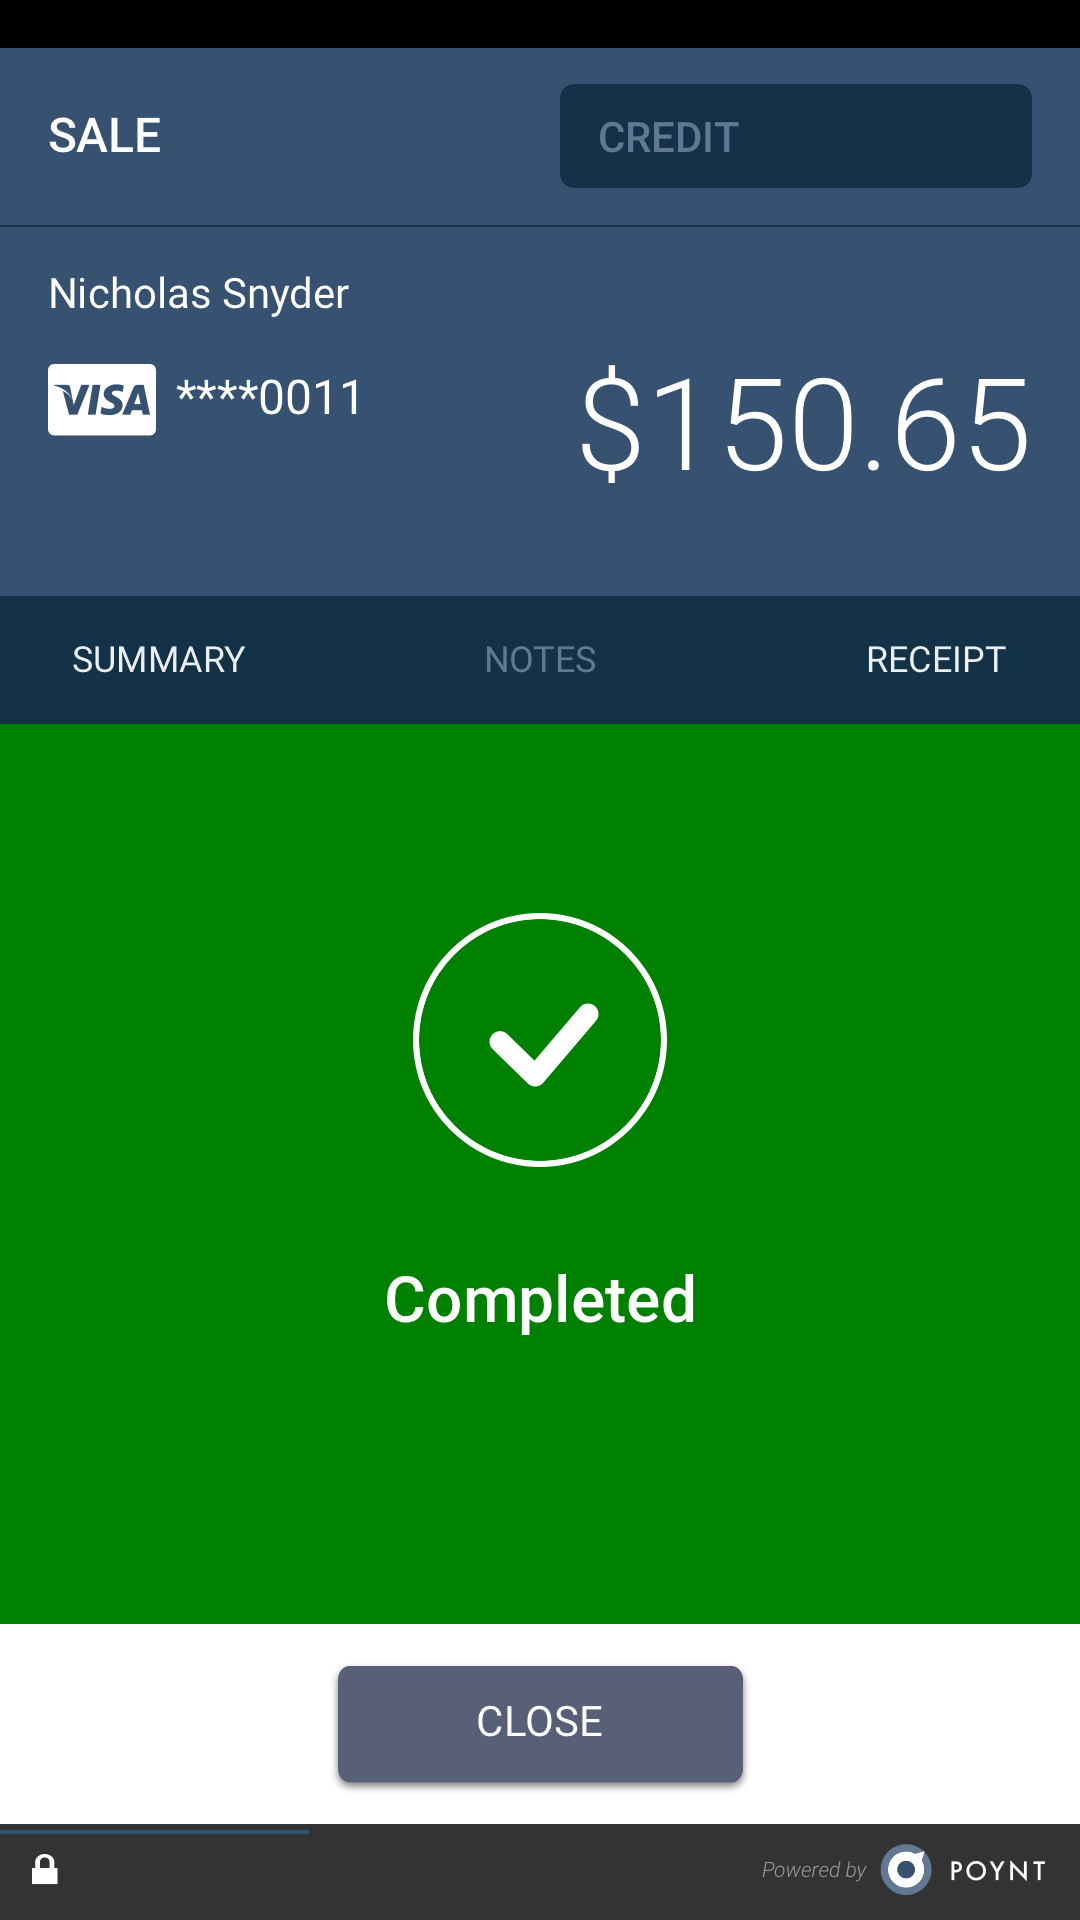
Processing a Payment with the Poynt 5
Counter to the dual-screen experience with the Poynt Smart Terminal, the Poynt 5 consolidates the merchant and customer experience onto one screen - all in the palm of your hand.
Because the device is in the palm of your hand, there are several ways that you can interact with your customers. The payment screen on the Poynt 5 takes into account that you may want to mount your device on the counter and pair with your Poynt Smart Terminal, hand the device over to your customer, or process the entire transaction on the behalf of the customer yourself.
Step 1: Enter your payment amount and press charge.

Step 2: The Insert or Swipe Card message will display. As a default, Credit is selected. If you’d like to swap payment methods, simply tap where it says Credit in the top right corner and select your preferred payment method.
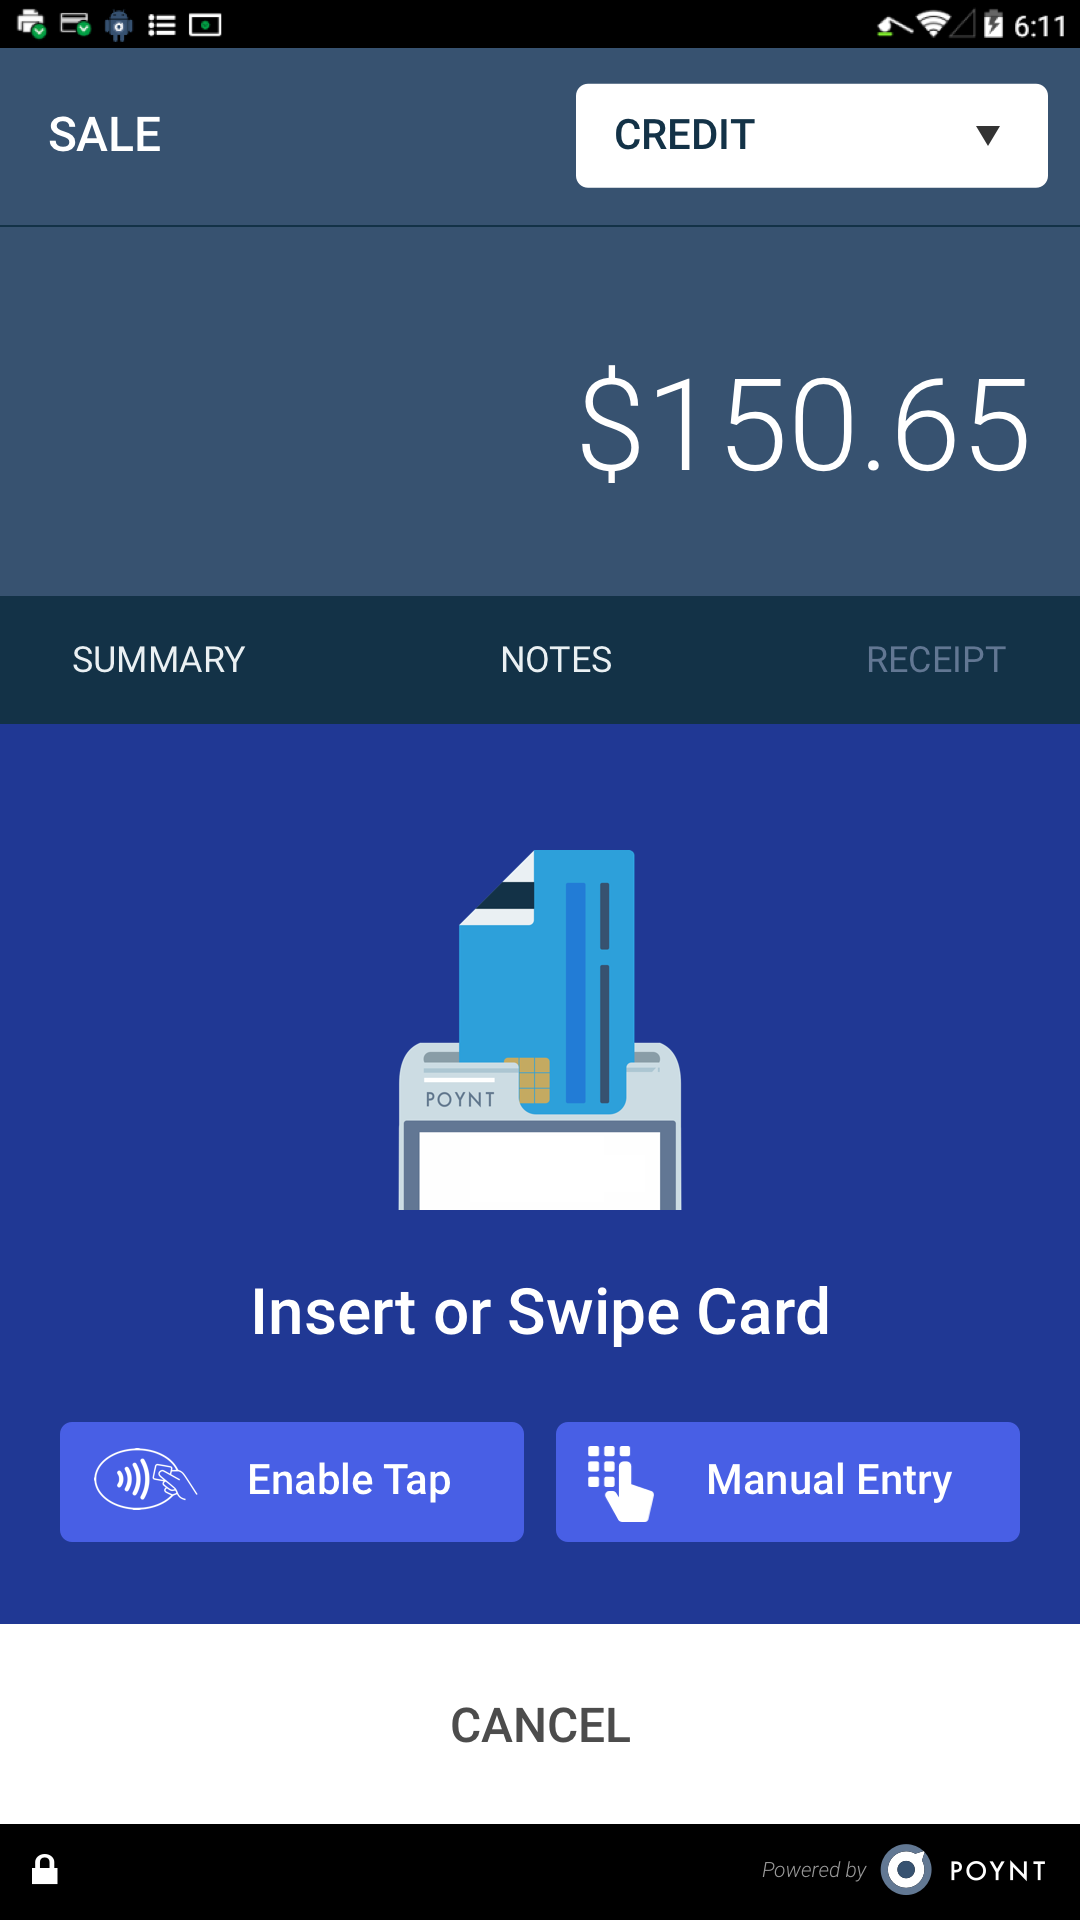
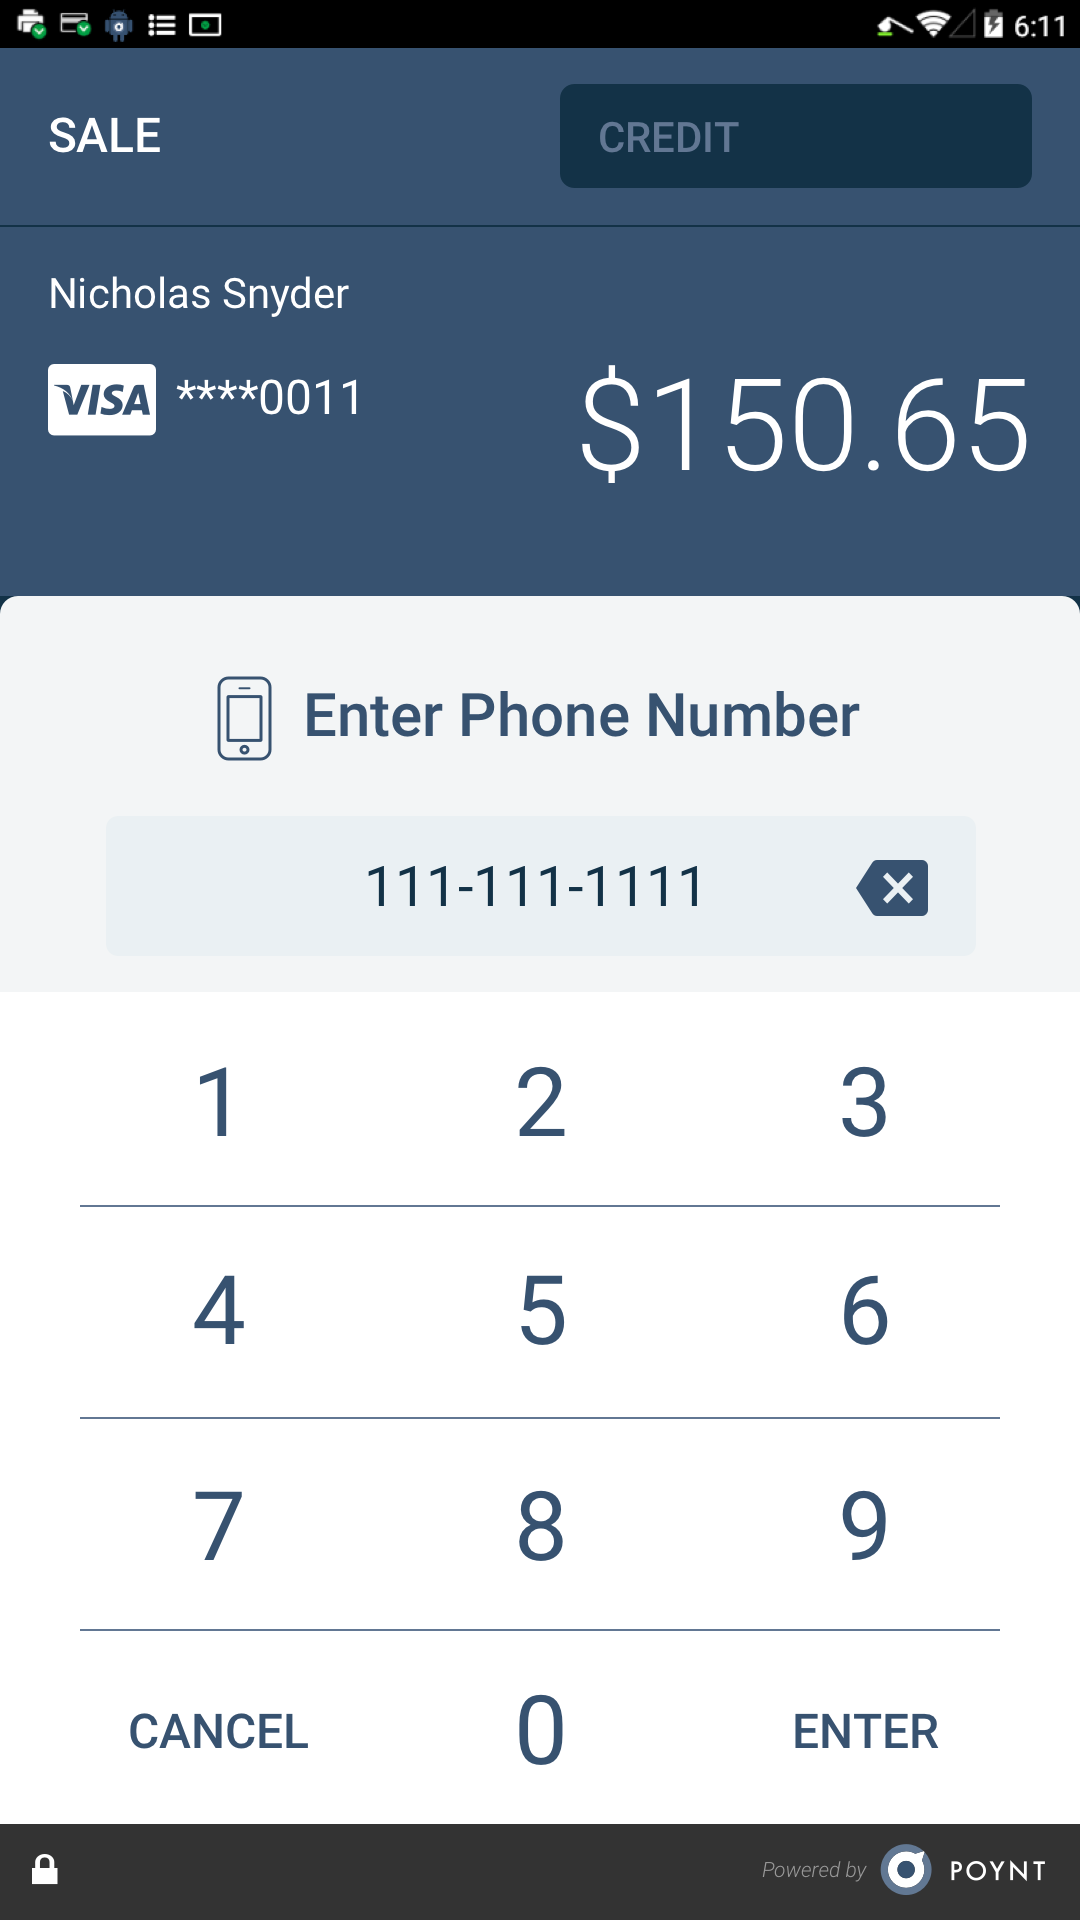
You may insert or swipe a card, enable tap for NFC payments, or manually enter the card info.
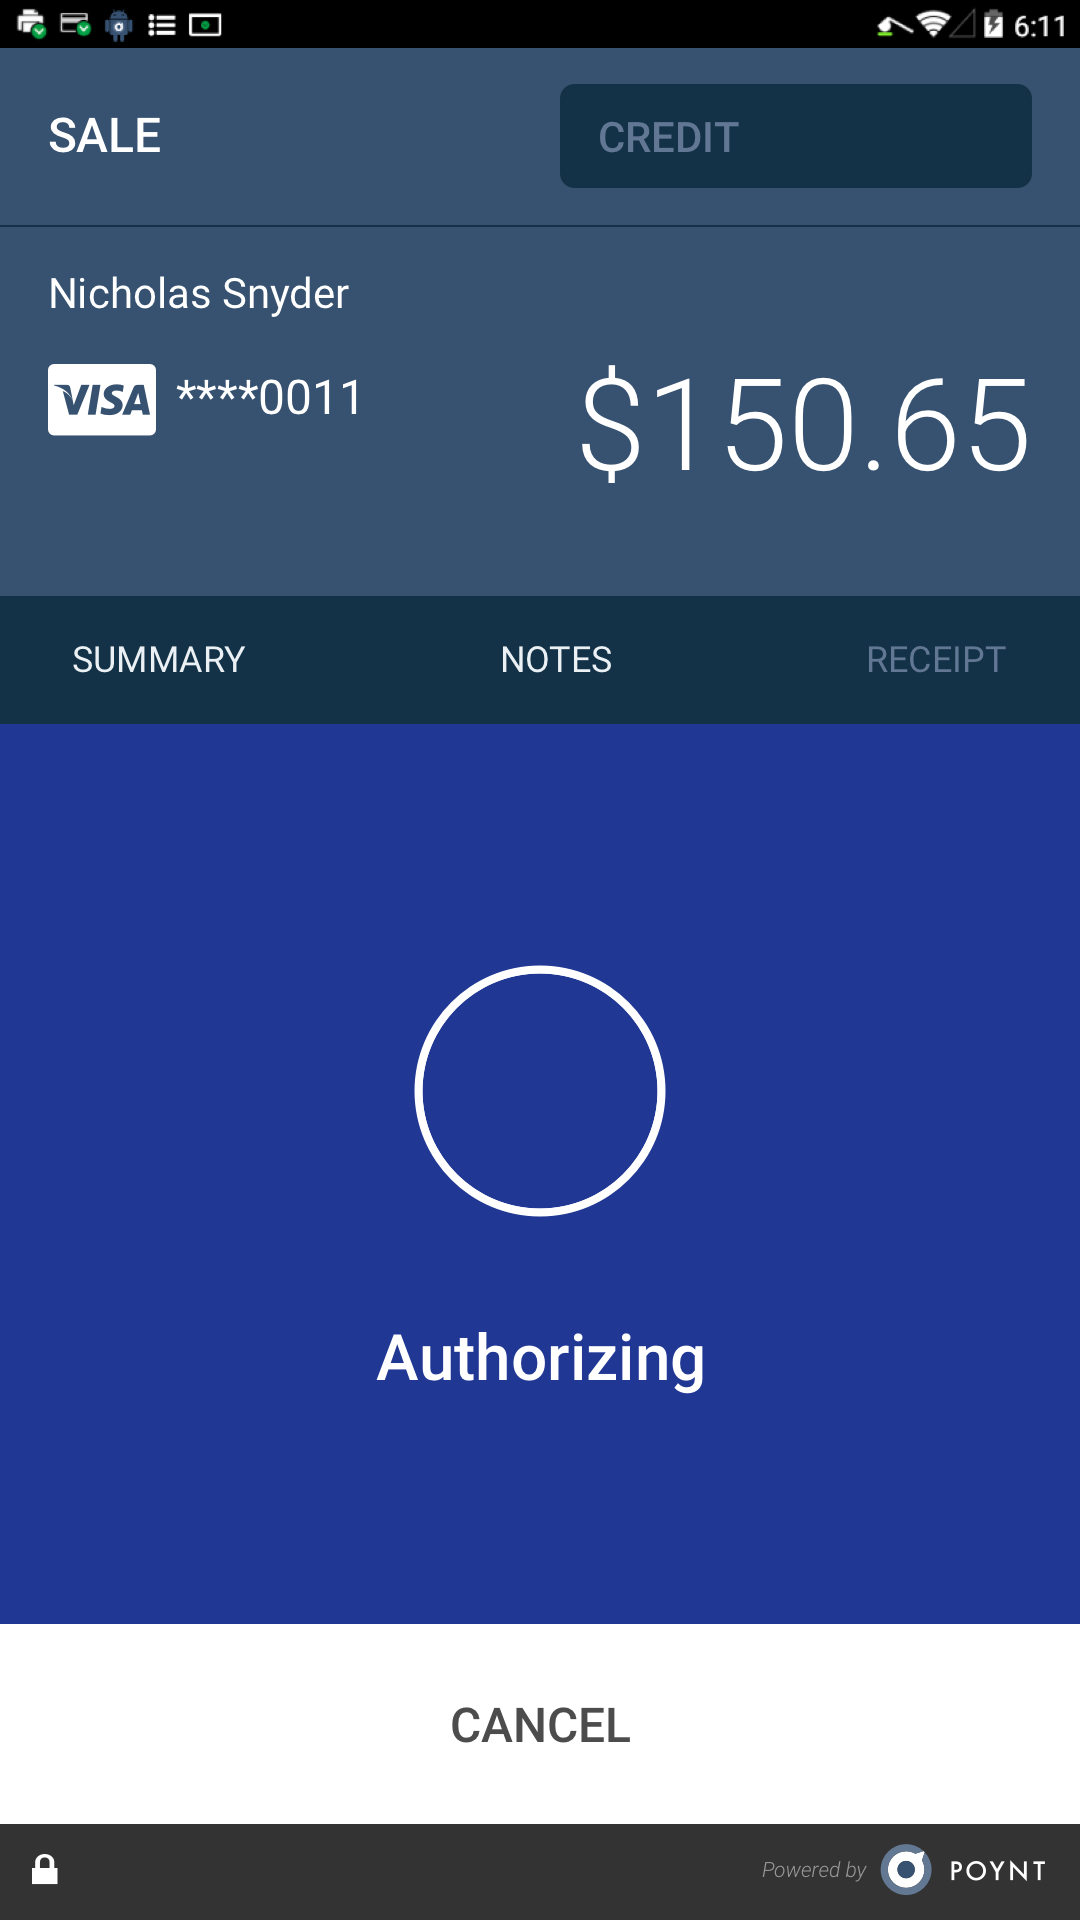
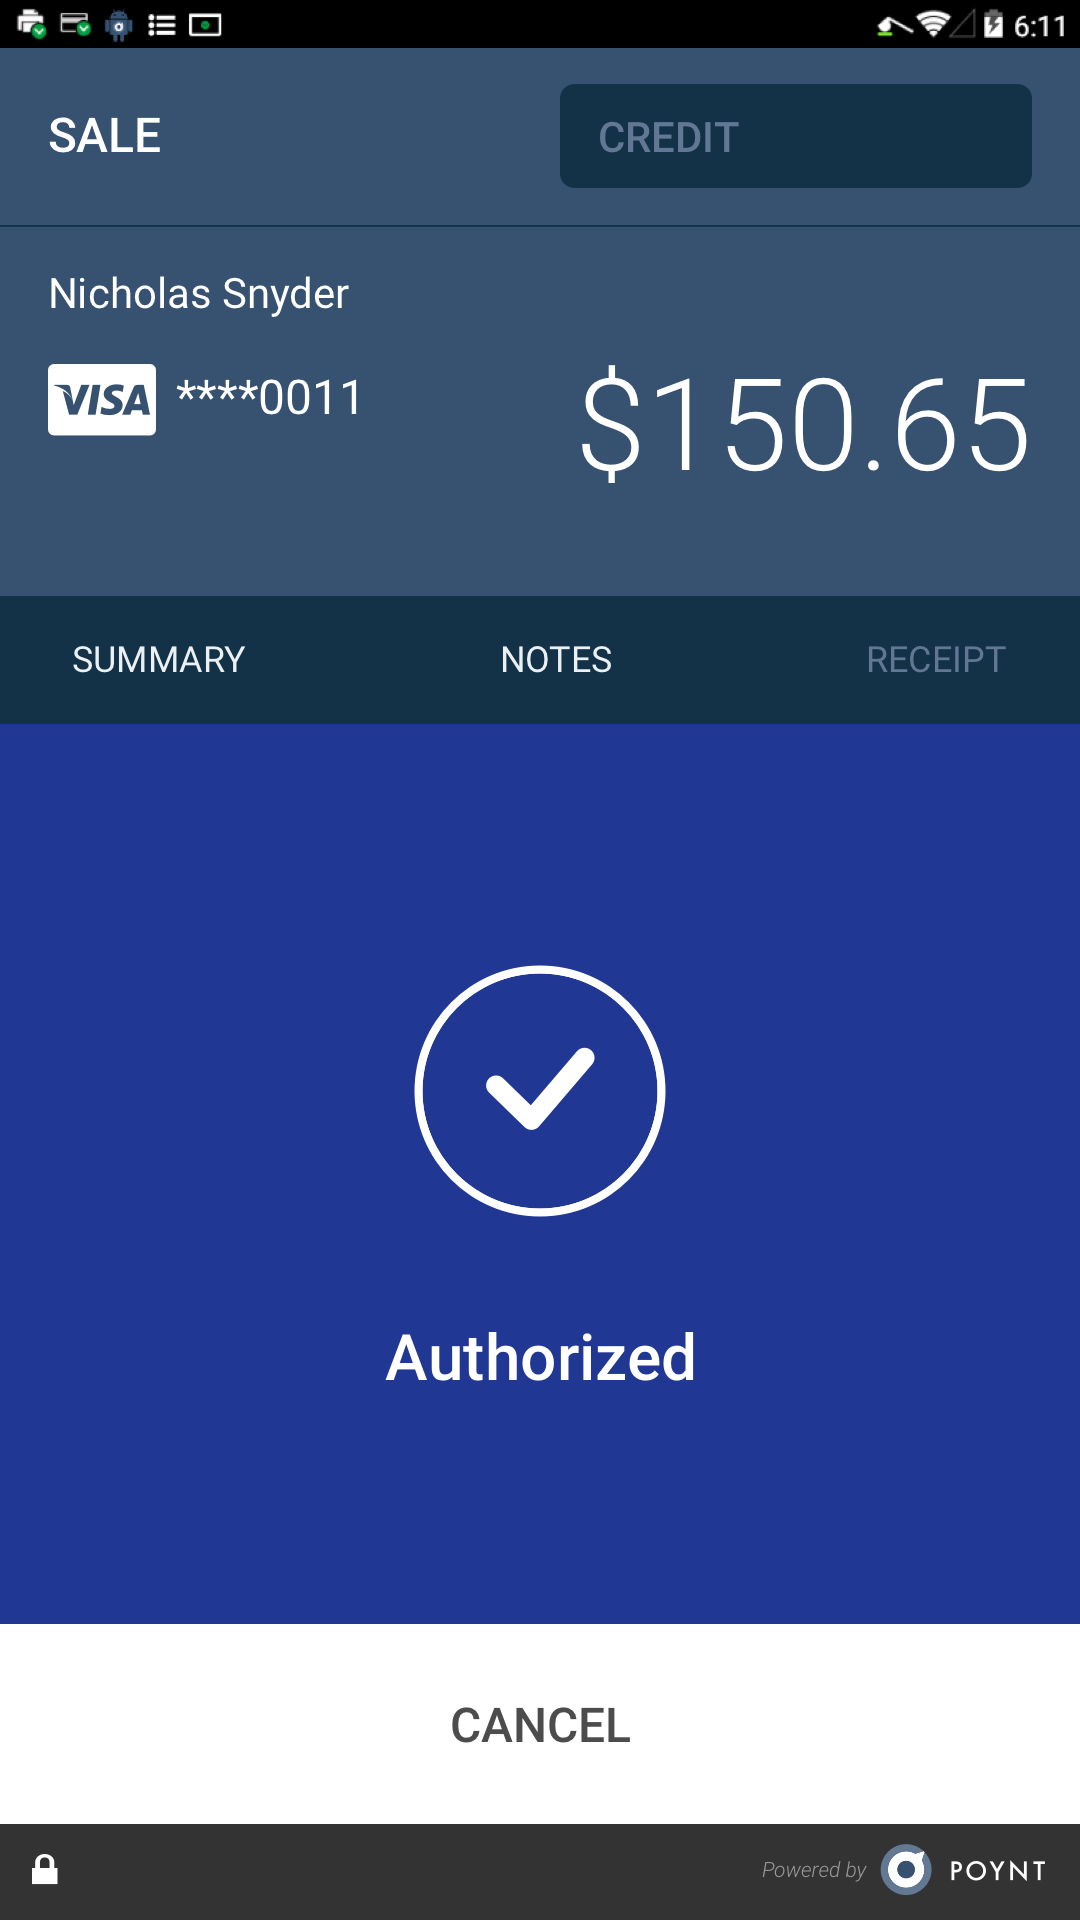
Step 3: The payment screen will then indicate when the payment authorization has completed.
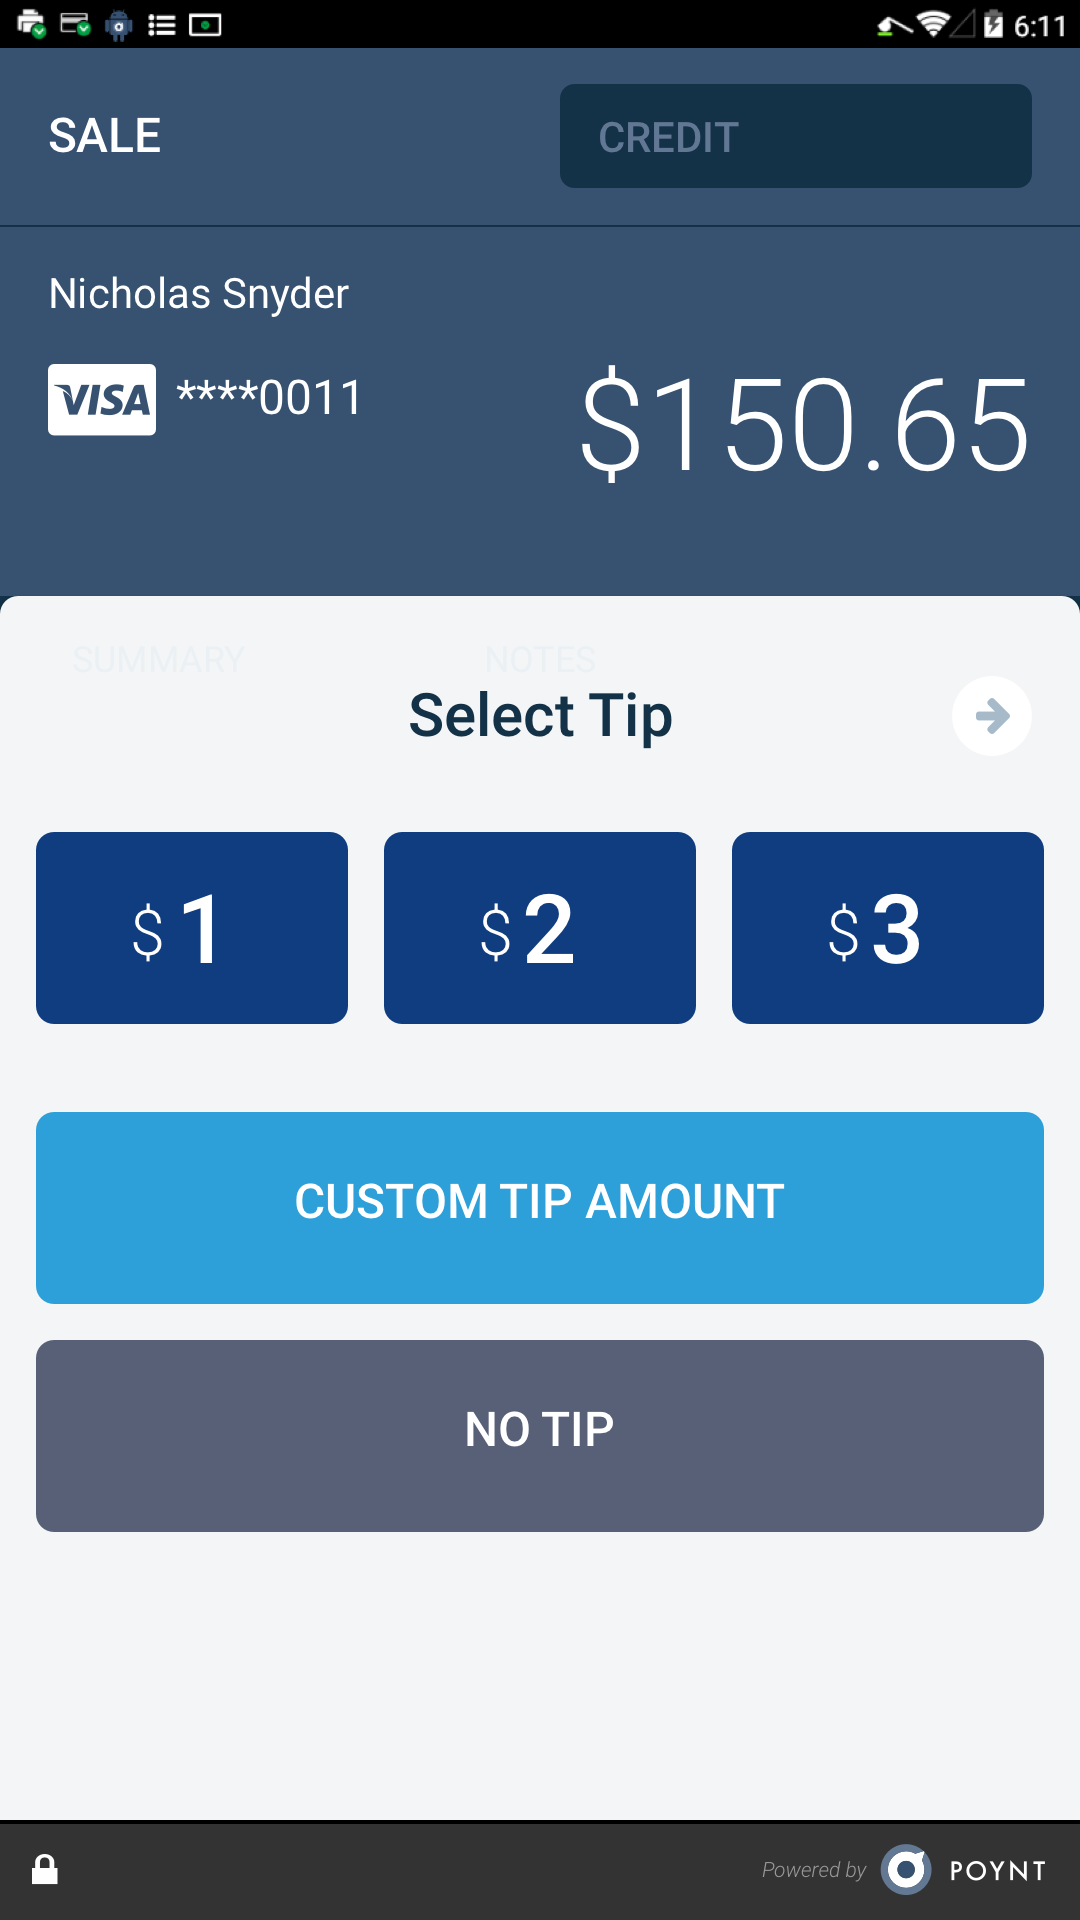
Step 4: Then, if tips are enabled, a tip amount may be selected from the prompted amounts. A custom tip amount may also be entered.

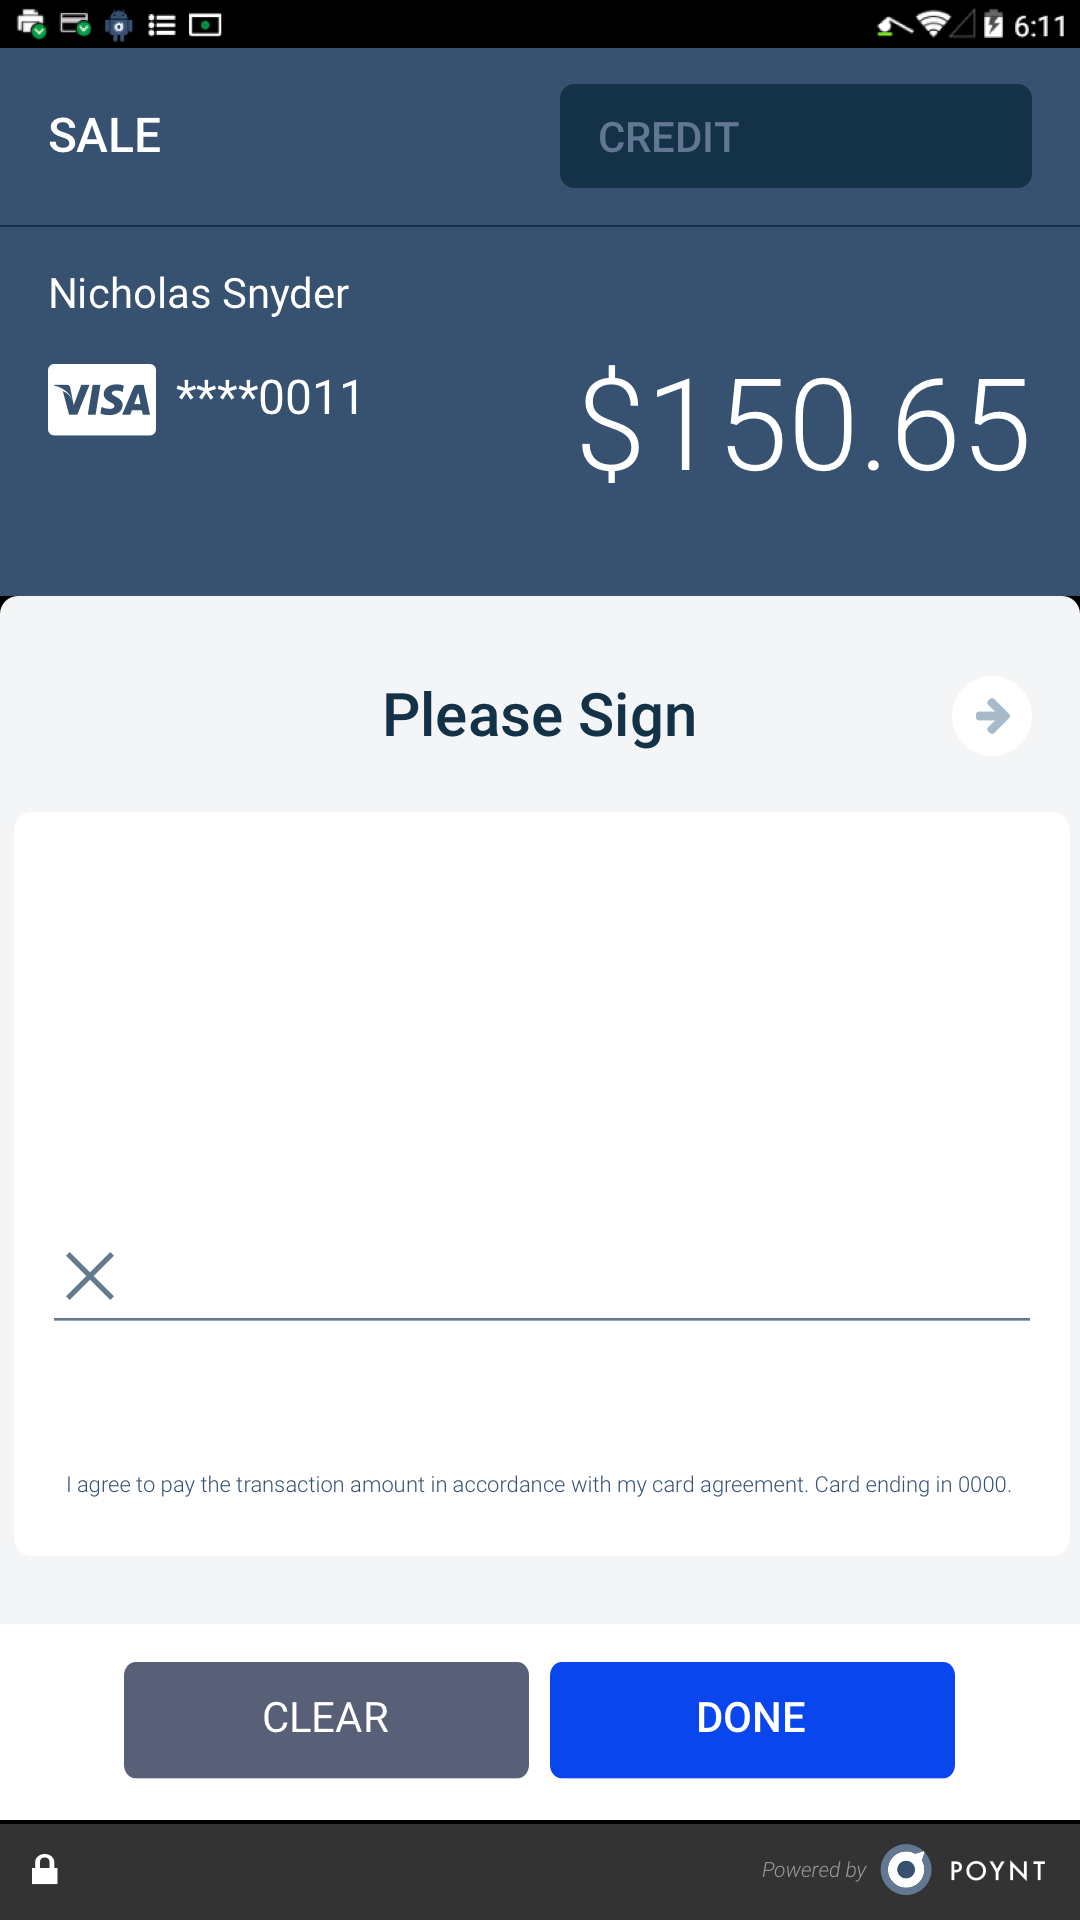
Step 5: The customer may then sign for their purchase on the Poynt 5 screen.
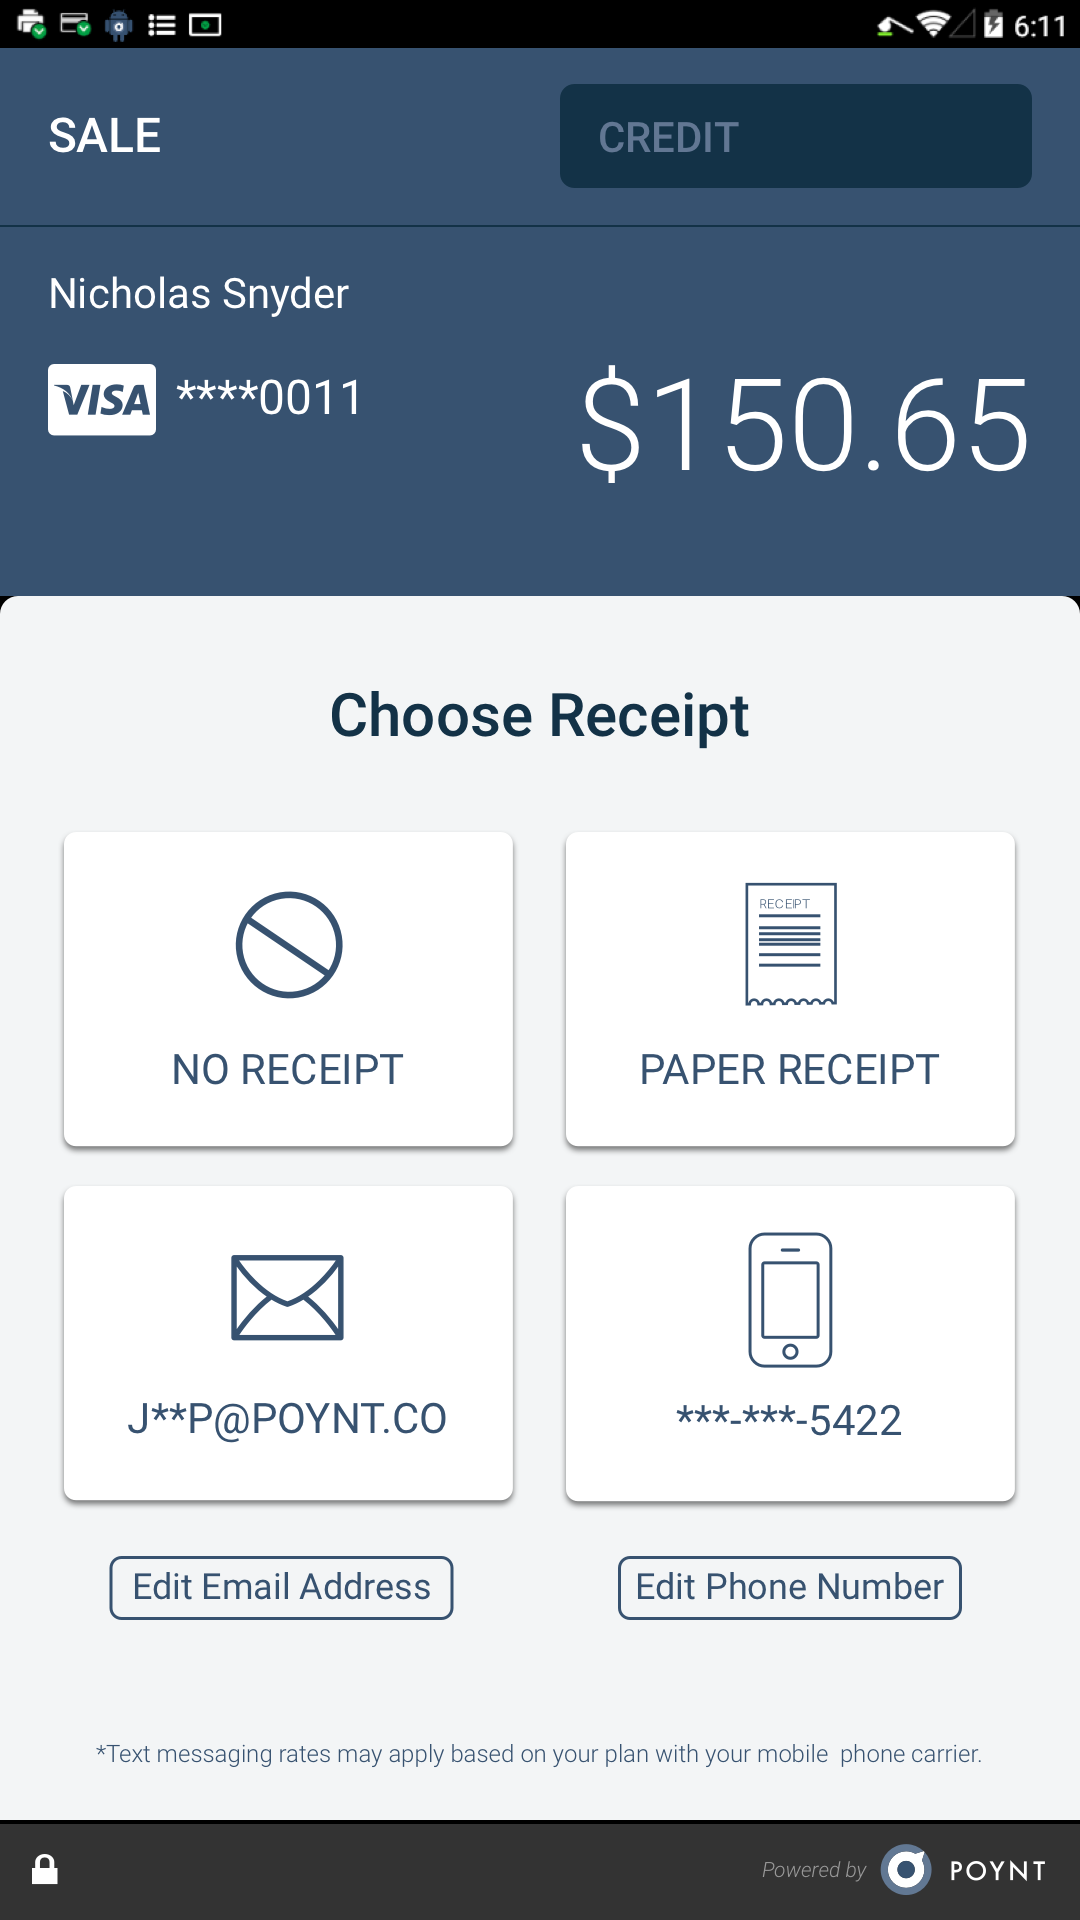
Step 6: The customer then selects their receipt type.
Step 7: Payment is complete and may be viewed in your Transactions list.