
eHopper POS (by B2B Software) is easy, intuitive and will allow you to ring up sales in minutes.
With any questions not addressed by this Quick Start Guide, please reach out to eHopper at 212-651-8911 or use the Contact Us button within the app on your terminal.
Why choose eHopper POS?
- Easy to learn how to use and train employees on
- Automate your order entry and cash register procedures
- Prevent employee errors
- Prevent cash drawer shortages
- Reduce operational costs and increase revenue with online inventory management
- Retain customer with tracking customer sales history
Launch eHopper and create an Account
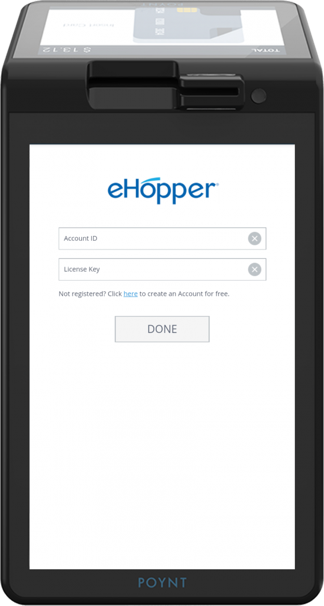
Tap on the eHopper app icon. Once eHopper is launched for the first time on Poynt, tap on the message below the text fields to create an account.
- Fill out the registration form, then submit the information once you have confirmed it is accurate.
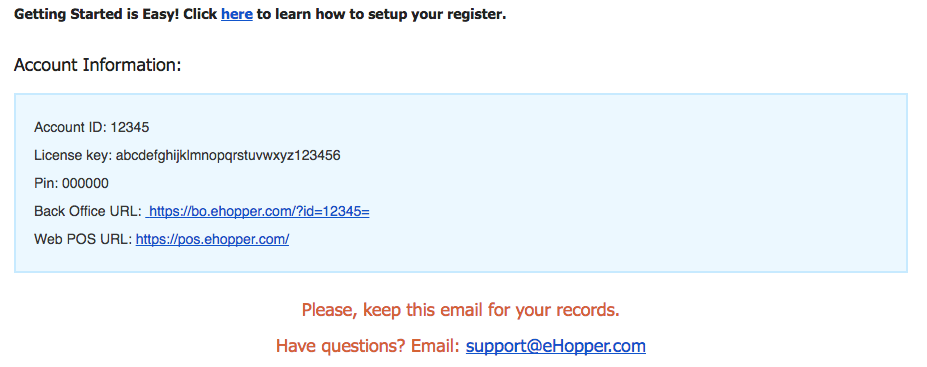
- Upon registration, you will receive an email containing your registration information. This includes your Account ID , License Key , and PIN #. Store this information in a secure place, as it is important.
Activate Your Account
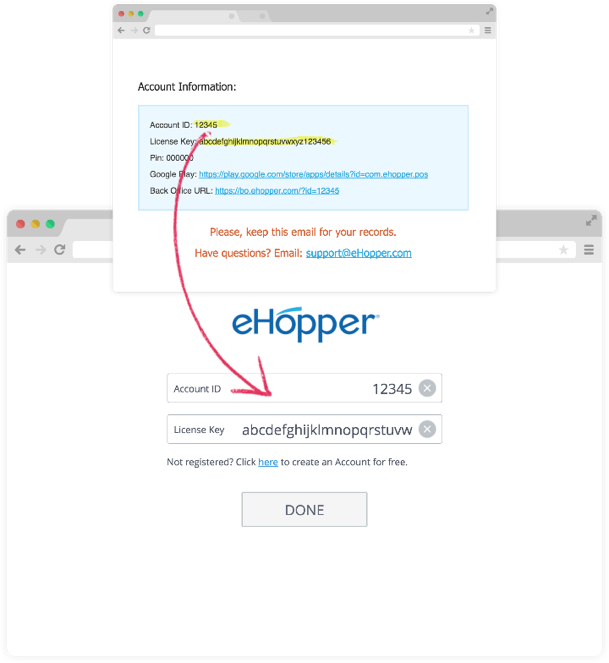
Access eHopper POS Activation screen, then enter in your Account ID and License Key from your Welcome email.
Setting Up Your Store
To set up your store, access your Back Office via URL provided in your welcome email.
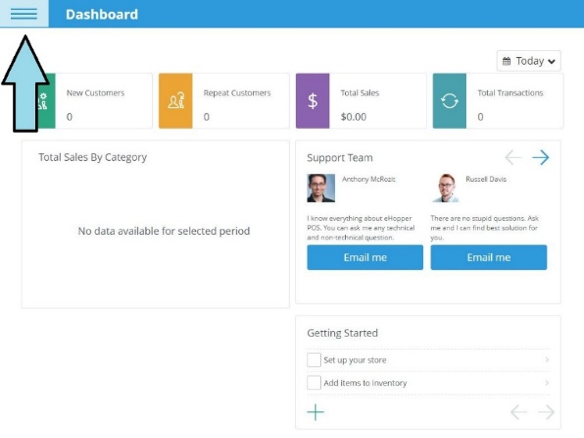
Once you login to eHopper, you will be brought to the main menu. Before you can begin using eHopper for business management and transaction processing, you must first set up your Company , Store and Taxes . You can access this by clicking the Navigation Bar on the upper-left of your screen.
To set up your Company profile:
- Select Settings , then select Company Settings . Input the applicable information, then select Done .
To set up your Store profile:
- Select Settings , then select Store Settings . Input the applicable information, then select Done .
To set up your Taxes :
- Select Settings , then select Tax Manager . Input the applicable information, then select Done .
Creating Your Inventory
Once you have completed the setup of your company, store, and taxes, you can then add items to your Inventory . You must also set up your Departments , Categories , and Modifiers . The inventory settings can be accessed from the Navigation menu.

To create Departments:
- Tap Departments
- Tap New Department
- Set the name and description, select whether it is active (visible in inventory selection) or not, then tap Done .
To create inventory Categories:
- Click Categories
- Click New Item
- Input the applicable information, then click Done.
To create inventory Modifiers :
- Click Modifiers
- Click New Modifier
- Select the Modifier Group
- Input the applicable information and click Done.
To add items to your Inventory :
Individual Items -
- Tap Products
- Tap New Item
- You can input information regarding Name, Description, Pricing, Modifiers, Vendors and Ordering by selecting the desired tab on the top of your screen.
- Once you have added all applicable information, tap Done.
Multiple Item Import –
- Tap the drop-down arrow next to New Item, and select Import Inventory
- At the import screen, you can choose a .CSV format Excel file that contains your desired product listings. Once you browse for the file and select it, tap Done.
Make a Sale
To test all of your initial settings, make a transaction within the Shopping Cart in on your Poynt device. Be sure to synchronize eHopper by tapping Sync or Synchronize link in the Navigation Menu.
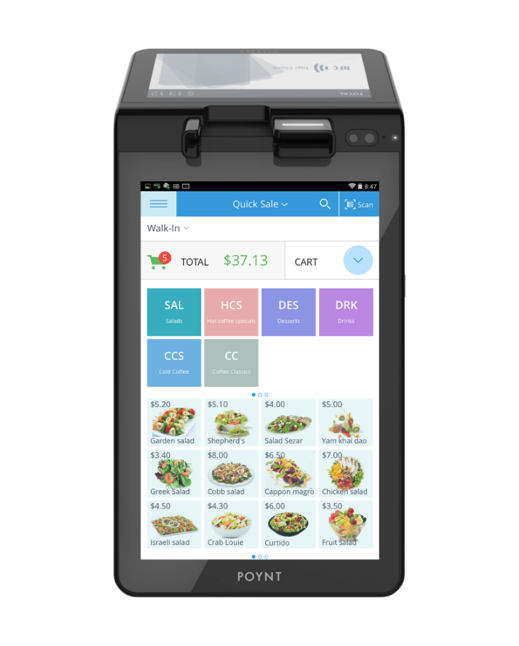
If you have successfully processed the transaction, you are now ready to use eHopper on Poynt.
Note: App availability may vary - please contact your sales organization representative for more info.