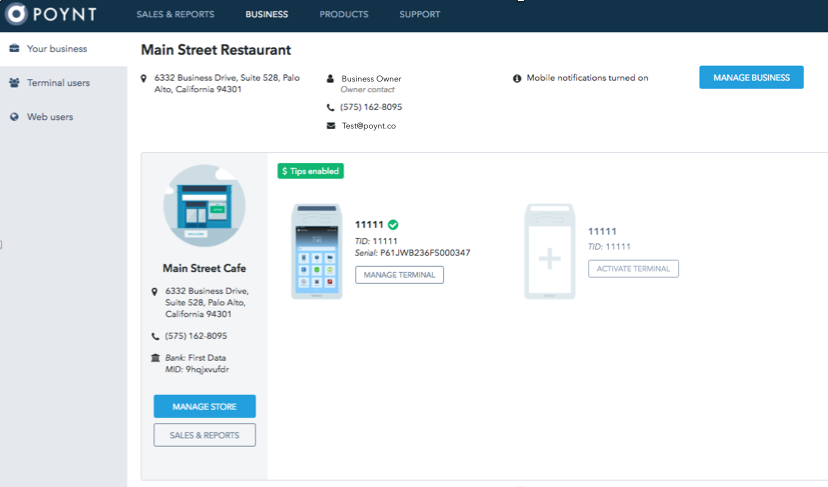
Under the Business tab, you have the ability to view and manage business settings, store settings, and manage your team using the terminal users and the web users tab.
In this article, we’ll cover the following topics. Feel free to read through it all, or skip ahead to a different section using the links below:
Manage Business
Manage Business settings allows you to update your contact information, email preferences, and notifications.
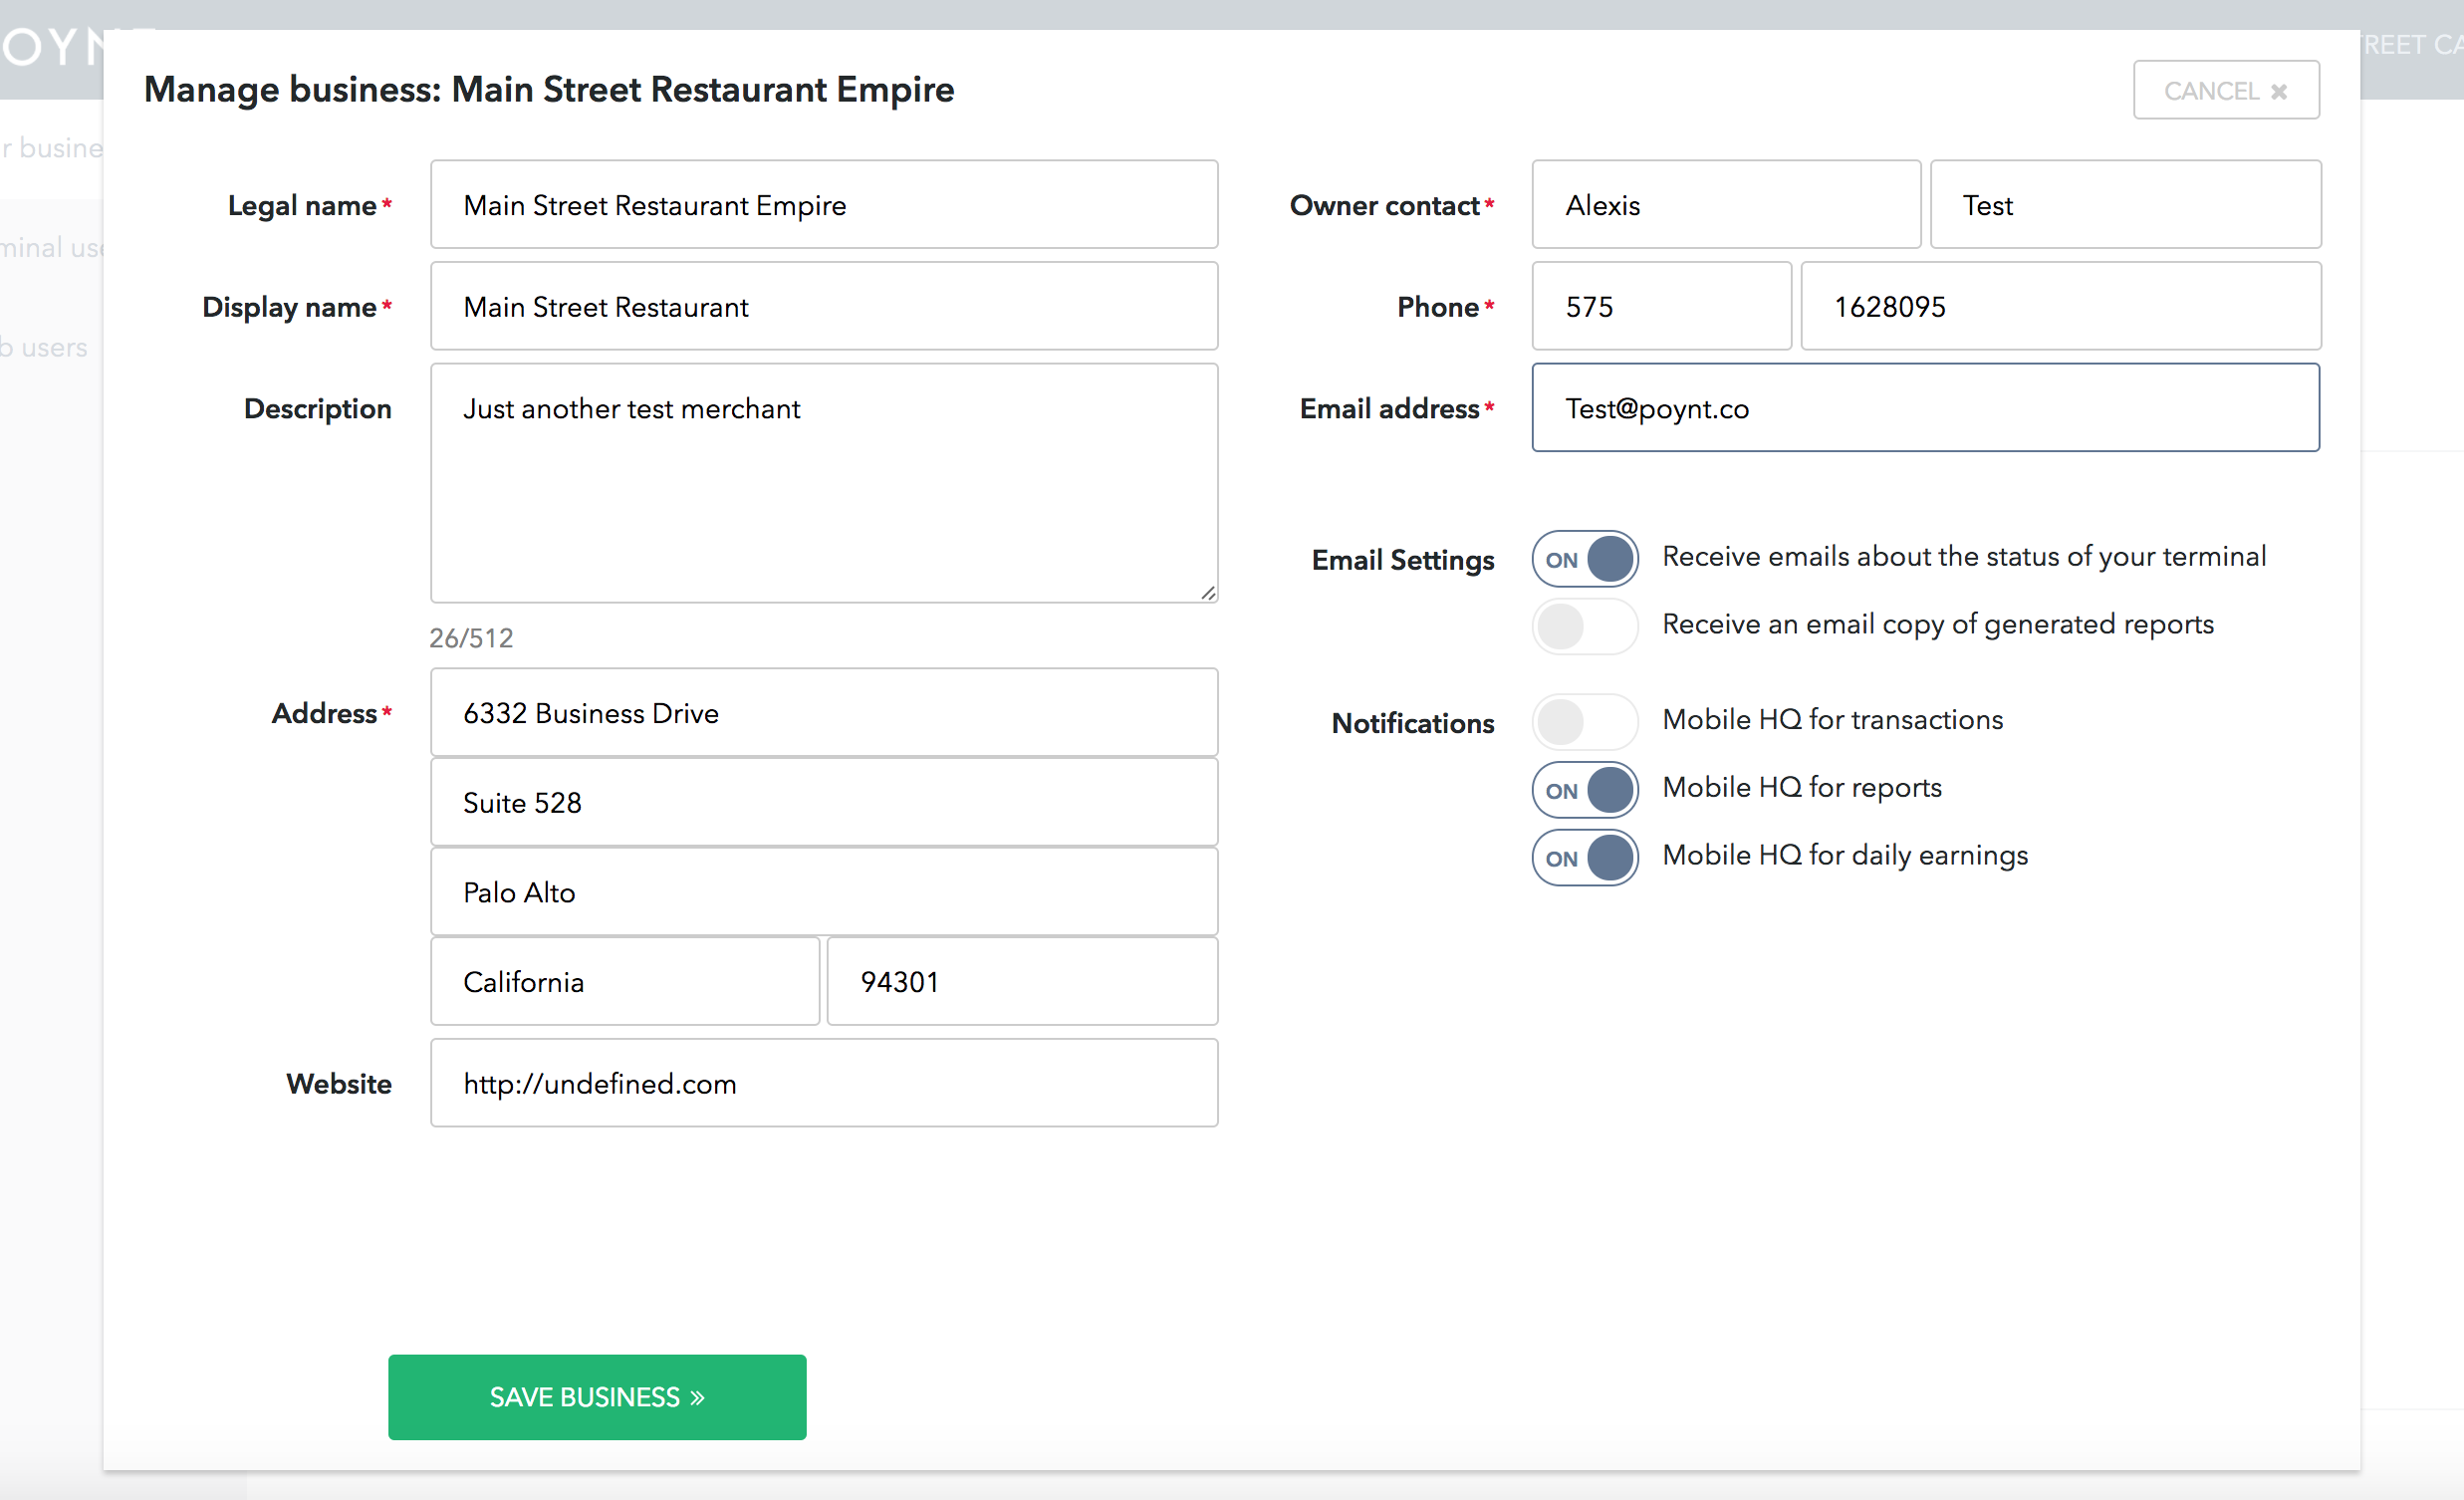
Note: You will have to reach out to your Reseller if the business name and address need to be updated.
- Email Settings - You can adjust the email settings toggles to determine whether you want to receive emails about the progress of your terminal while you’re waiting for it to arrive. You may also toggle on the setting to receive an email copy of the reports you generate on your Terminal or on your Poynt HQ web portal.
- Notifications - If you download the iOS or Android HQ mobile application, you can update how you receive notifications here.
Manage Store
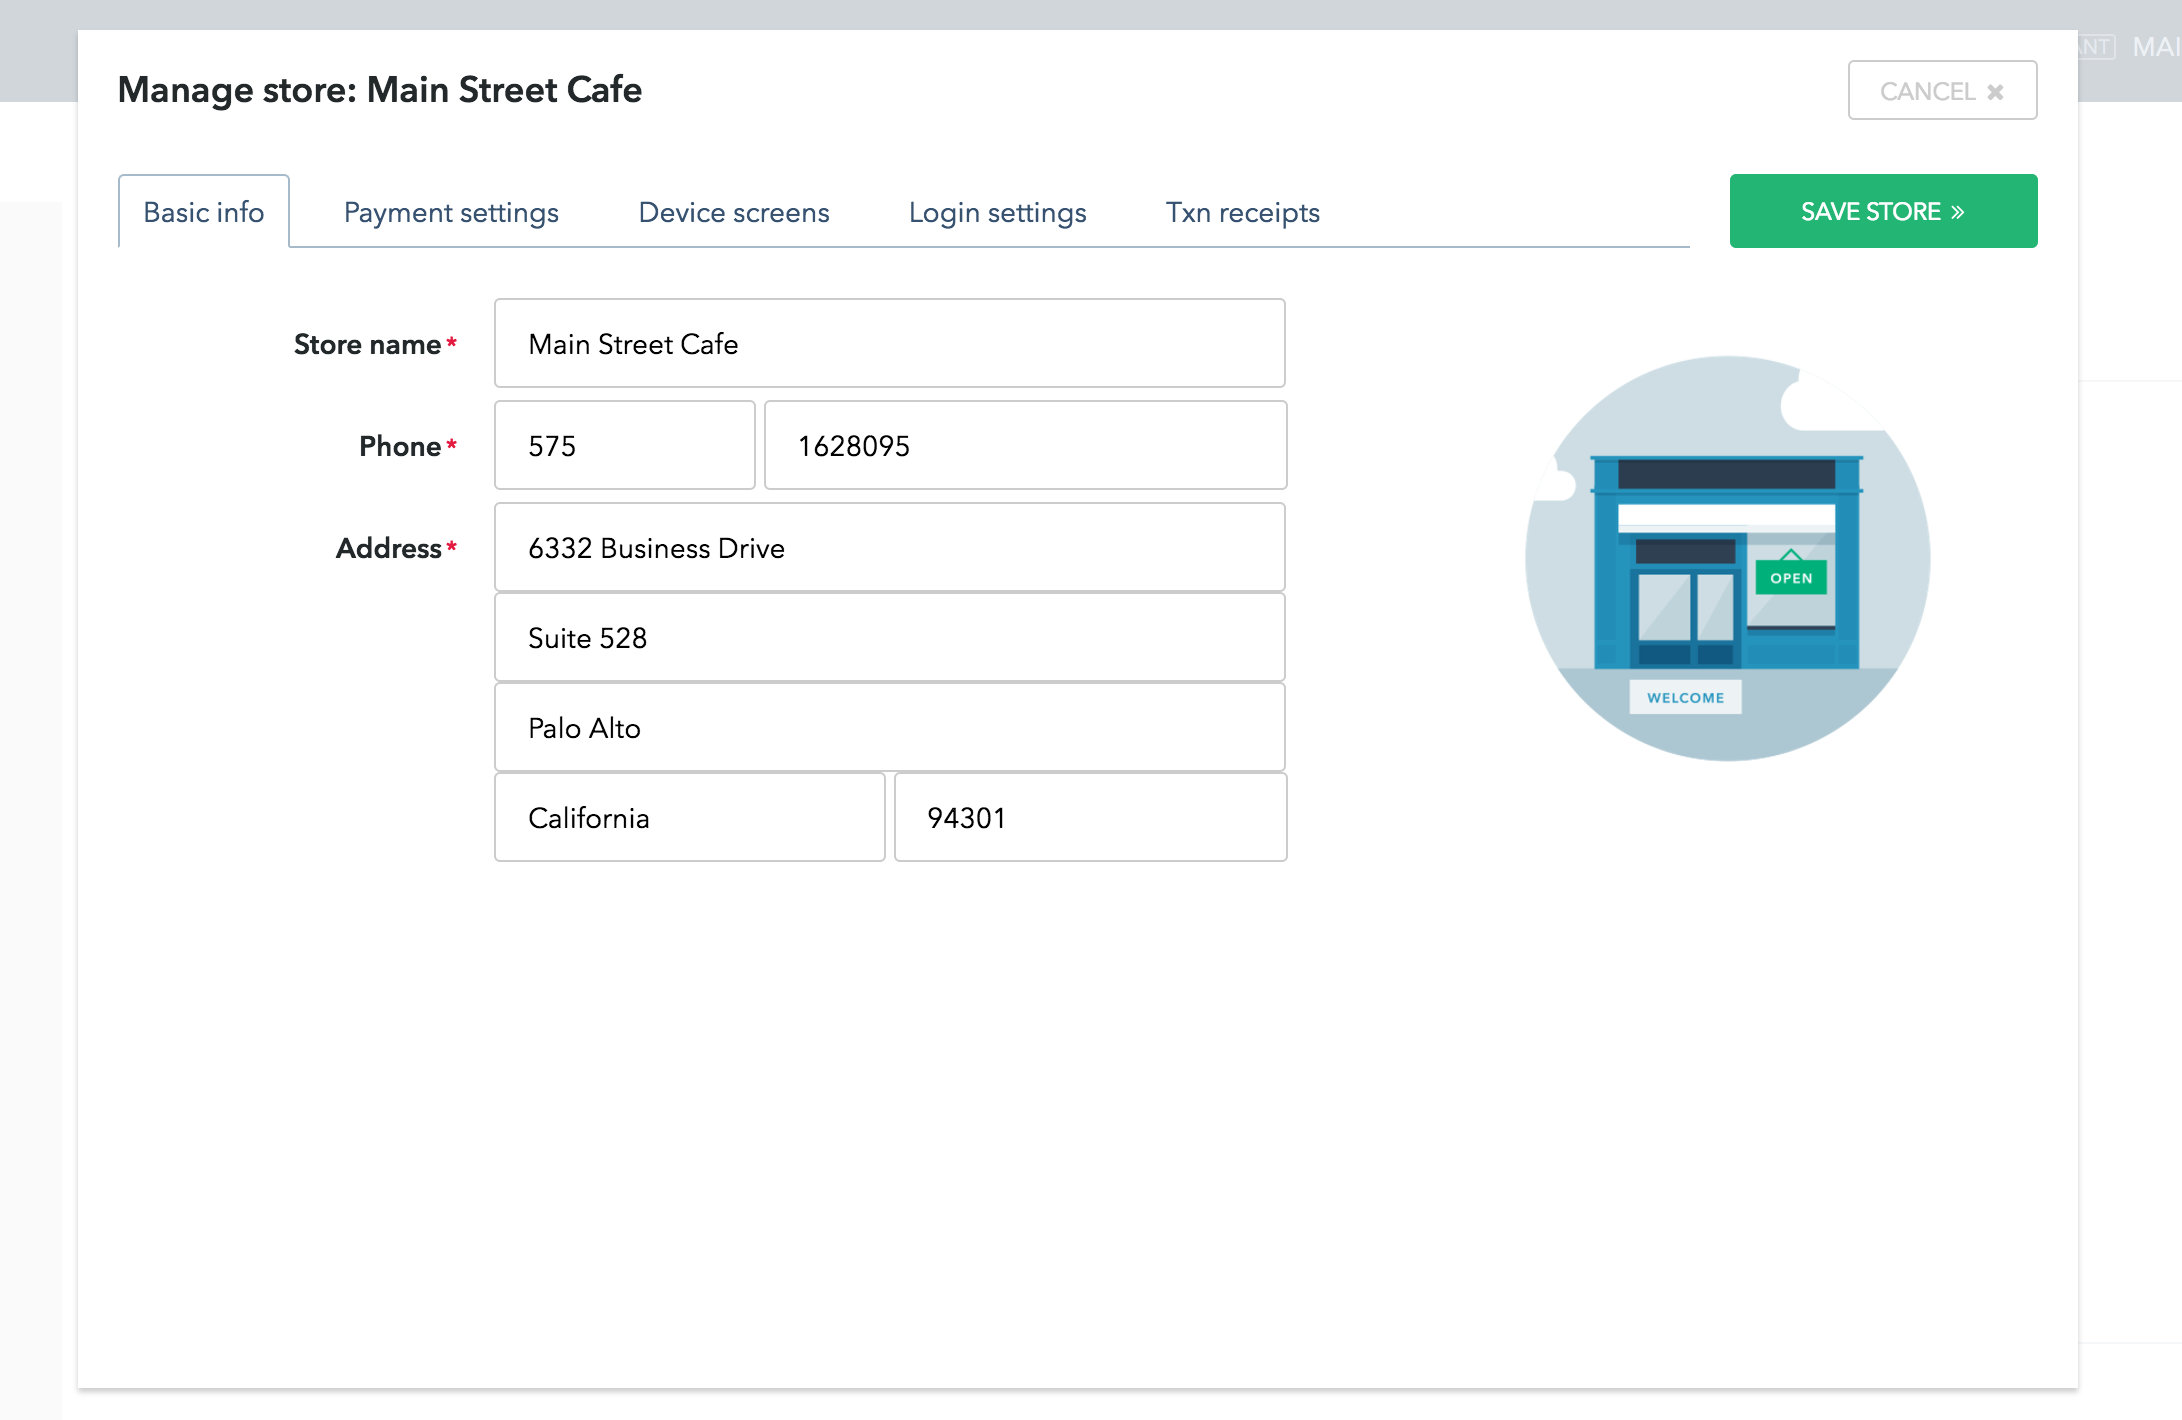
Within Manage Store, you may update the store name, set tips, customize the screens on their terminal, and establish other login and receipt settings.
- Payment Settings - Under payment settings the ability to allow customers to accept tips may be selected or deselected. You may also customize the prompted tip and whether it is a dollar amount or a percentage.
-
Device Screens - Upload a custom image for both of the screens on the terminal.
- Dimensions: Merchant Screen - 800x1280 JPG or PNG / Customer Screen - 800x480 JPG or PNG
- Login Settings - Under login settings you have the ability to enable the terminal to automatically sleep and set preferences for the terminal to automatically sign out.
- Transaction Receipts - Customize your store’s receipts with your business’ address and hours and social media handles. You may also toggle off any receipt type that you would like to hide during the customer checkout flow.
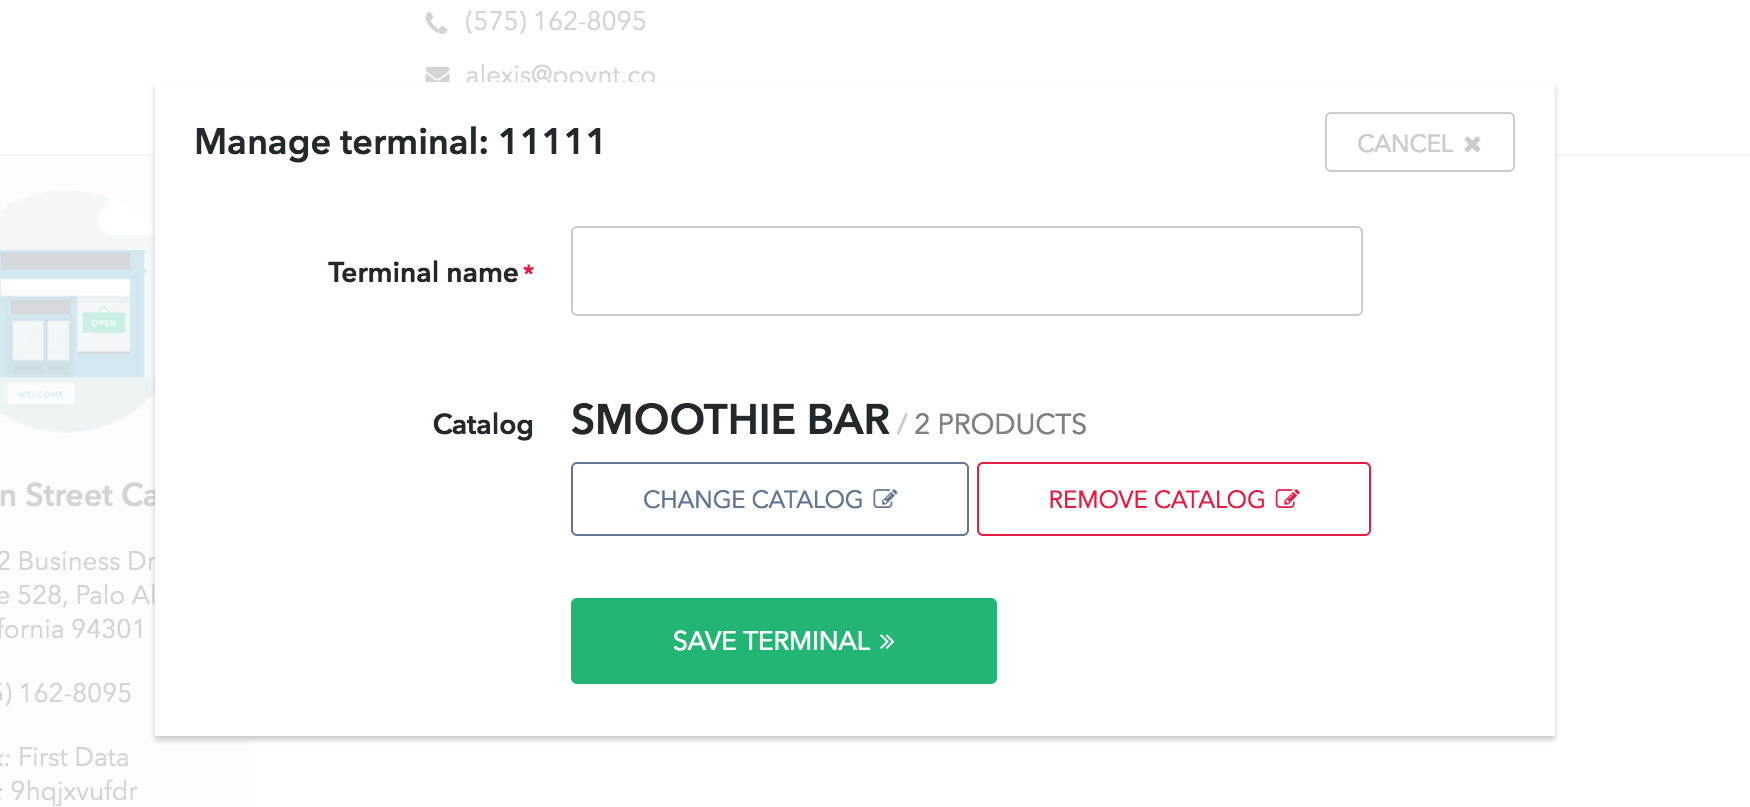
Manage Terminal
Rename and set the default catalog on each terminal under Manage Terminal.
Manage Terminal Users
Along the left-hand menu, you’ll see a tab called Terminal Users. This is where you manage your team and the settings they have access to when using the Terminal. Hover over the (i) icon next to User Permissions to view the restricted activities per Terminal User role.
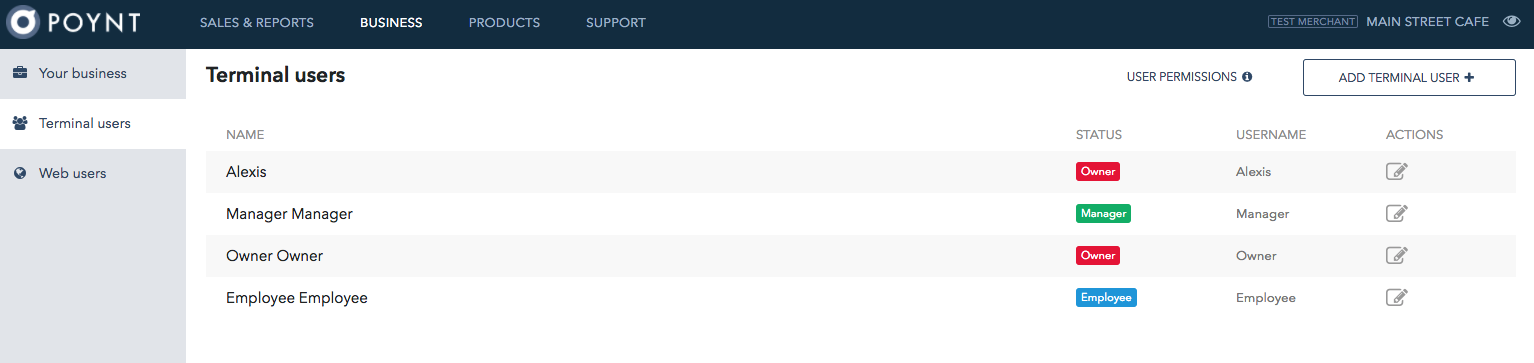

Simply select the Add Terminal User button to get started.
Enter the vital information to create the user. Note the user role drop down menu, and hover over the (i) icon for a refresher if needed.
Once created, the user will appear on the Terminal as a user when activated.

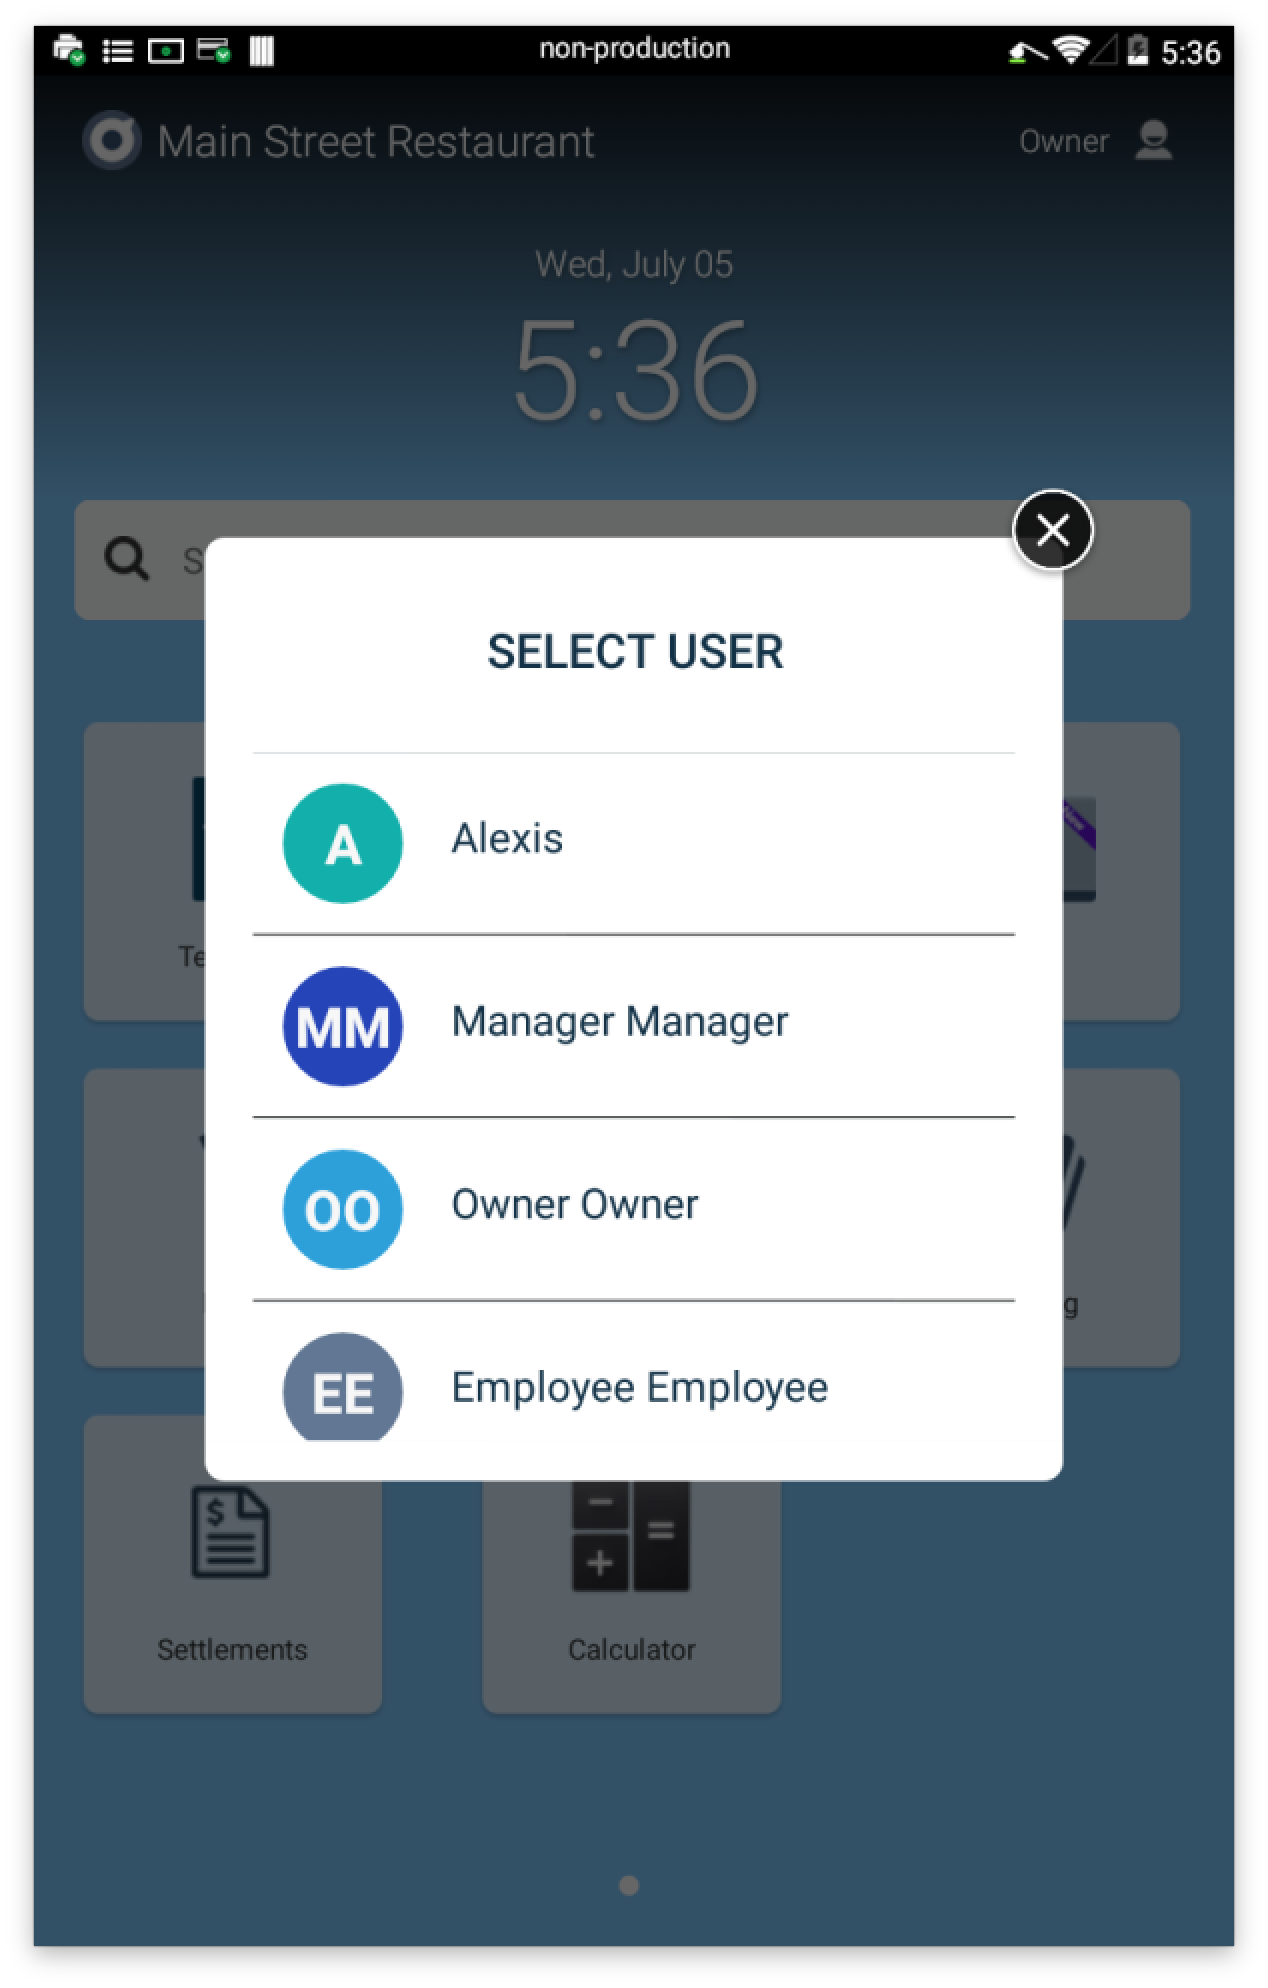
On the Home screen, the name in the top right corner will indicate which user you’re signed in as. You can swap users on the terminal quickly by selecting this icon and choosing the user you’d like to log in from the menu. Once you select that user, you will be prompted to enter the user PIN.
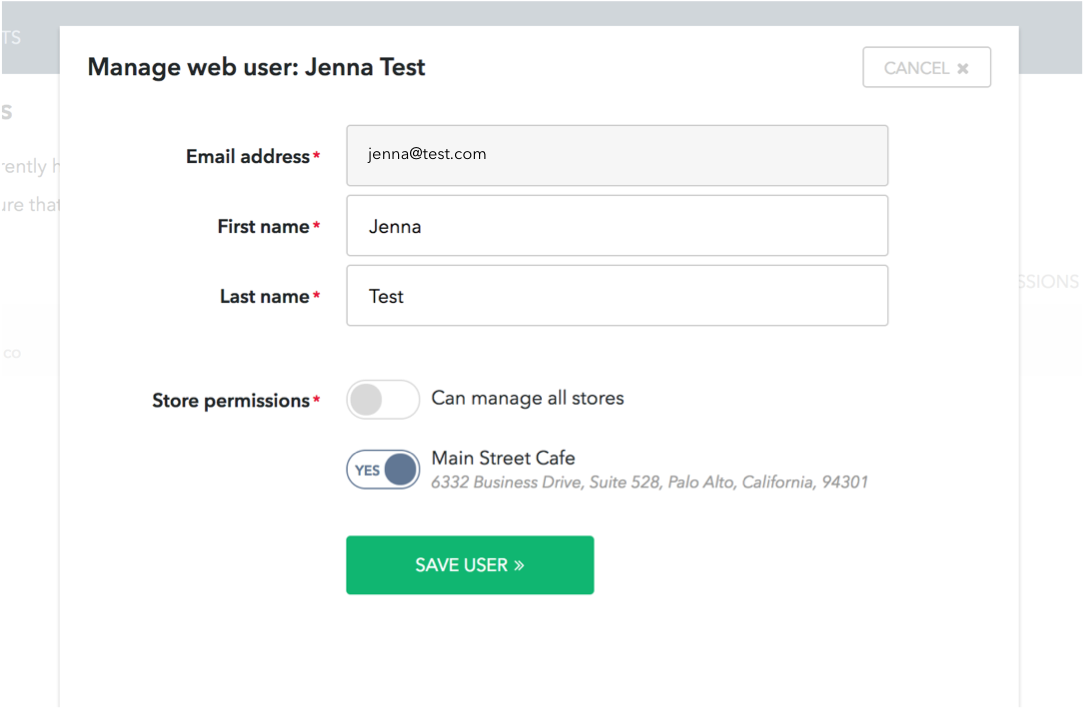
Manage Web Users
Along the left-hand menu, you’ll see a tab called Web Users. When a user is invited and creates their login, they will be able to access all of the reports, settlements, and settings that Poynt HQ offers. Please note this and only provide access to store owners and managers.
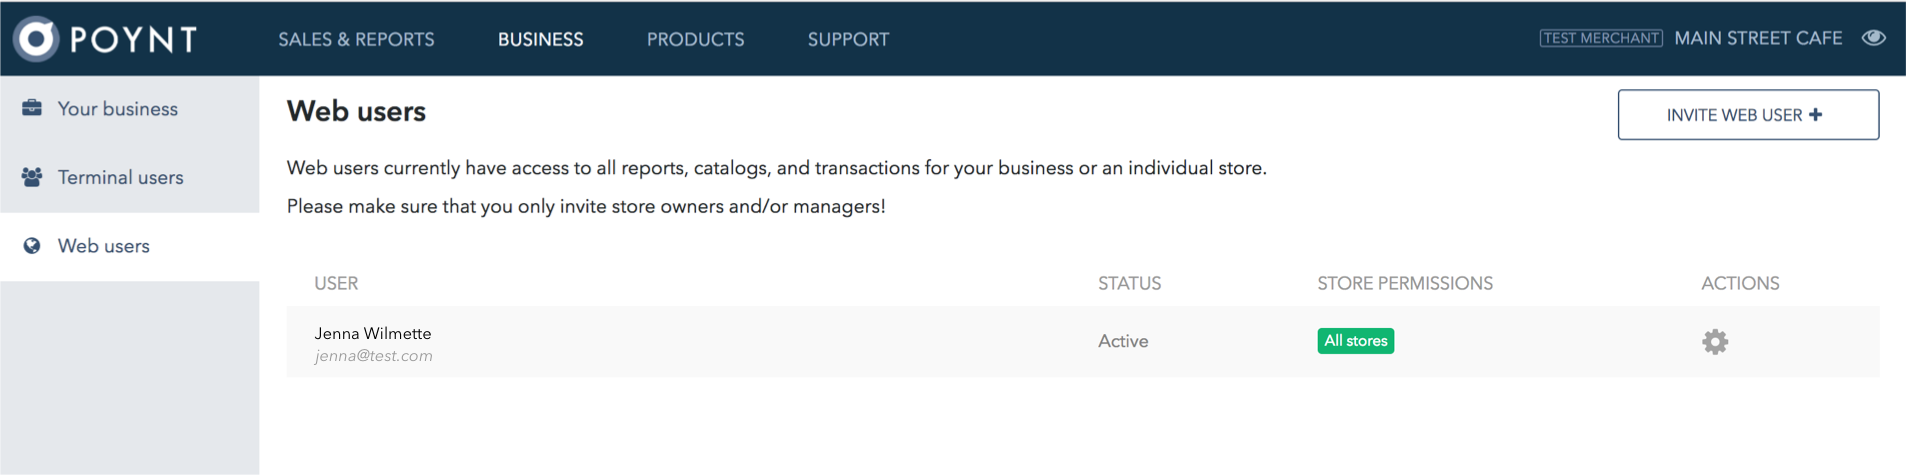
Once the web user accepts the invite and creates an account, you may decide that a web user has access to all stores under the MID, or just a specific store. Edit this setting by selecting the gear icon and toggling off the “Can manage all stores” settings.
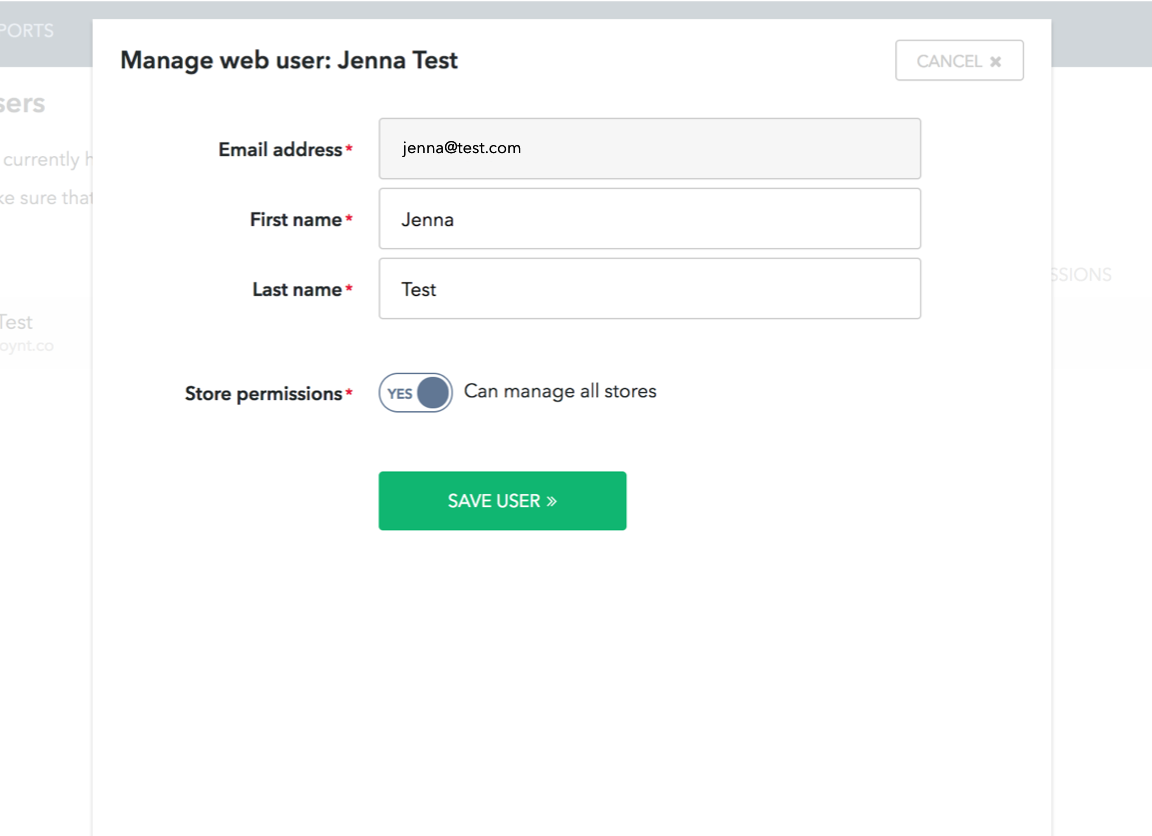
Once that setting is deselected, the applicable stores will be visible below that setting so that you may adjust accordingly.