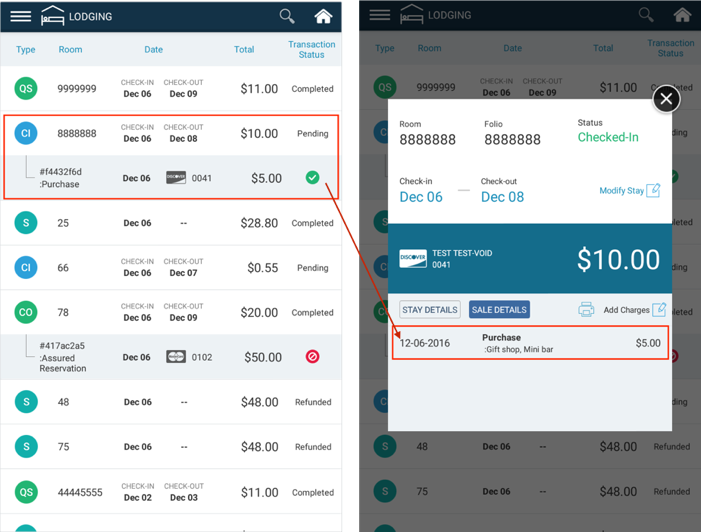
If you wish to keep track of these Sale transactions as part of the guest’s Stay, you can use the Add Charges functionality directly from the Stay Details screen. Sale transactions are those which are not Check-In, Check-Out, or Quick Stay.
You will be prompted to select/tap the applicable Sale transaction type. Sale transactions for the types Purchase and Delayed Charge will also prompt for Extra Charge reasons; you may select more than one Extra Charge reason for that transaction. Sale transaction type and Extra Charge reason(s) will appear on the guest receipt as well as Transaction Reports.
For Add Charges Sale transactions, the customer will be prompted for card insert/swipe/tap and will be authorized for the Total Amount entered in and will be immediately captured and placed in the current day’s Open Settlement Batch until the batch is submitted and closed later that day by the lodging clerk/manager.
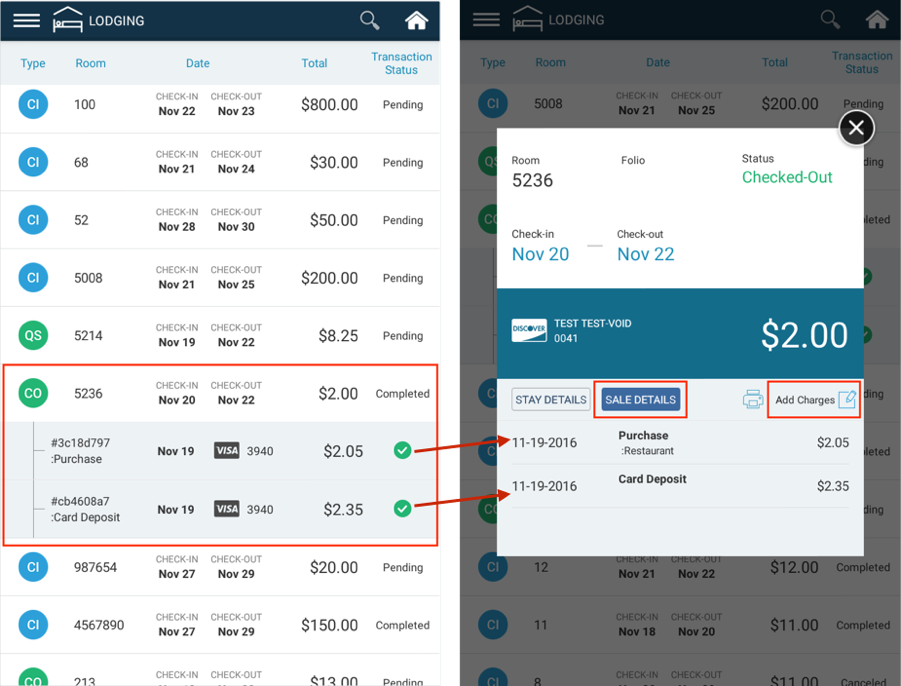
Sale transactions processed from the Add Charges flow will be grouped under the Stay information in the Details List. Tapping on the Check-In, Check-Out, or Quick Stay record will show the Stay Details pop-up. Tapping on the Sale Details tab will show any of the grouped Sale transactions on this tab.
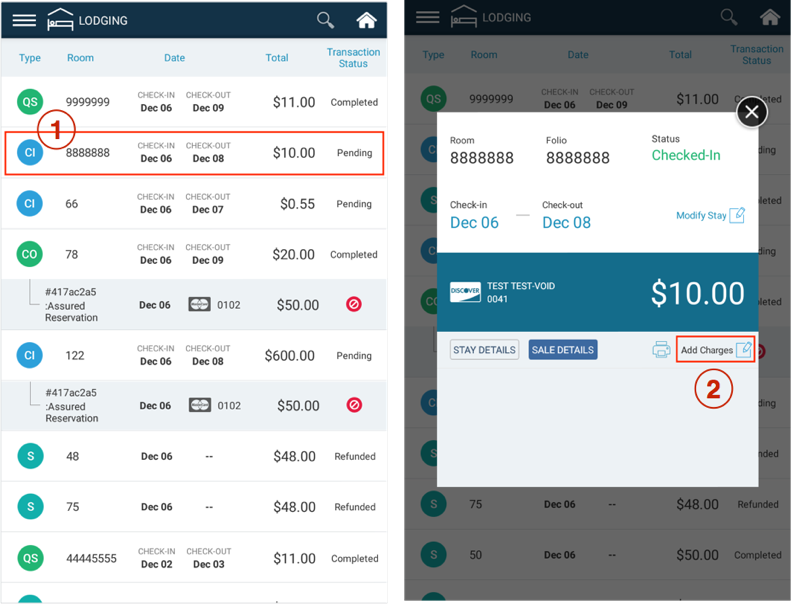
Step 1: To begin an Add Charges (Sale) transaction (which will capture funds on the same day), search for and pull up the details of an existing Checked-In , Checked-Out , or Quick Stay transaction from the Details List.
Step 2: Tap on Add Charges .
Step 3: Select a Sale transaction type. Tap Next.
Step 4: For Sale Types of “Purchase” or “Delayed Charges”, you will also be prompted to choose “Extra Charge Reasons”. Select/tap all reasons which apply. Tap Next.
Step 5: Enter the Total Amount for the Sale transaction. Tap Next.

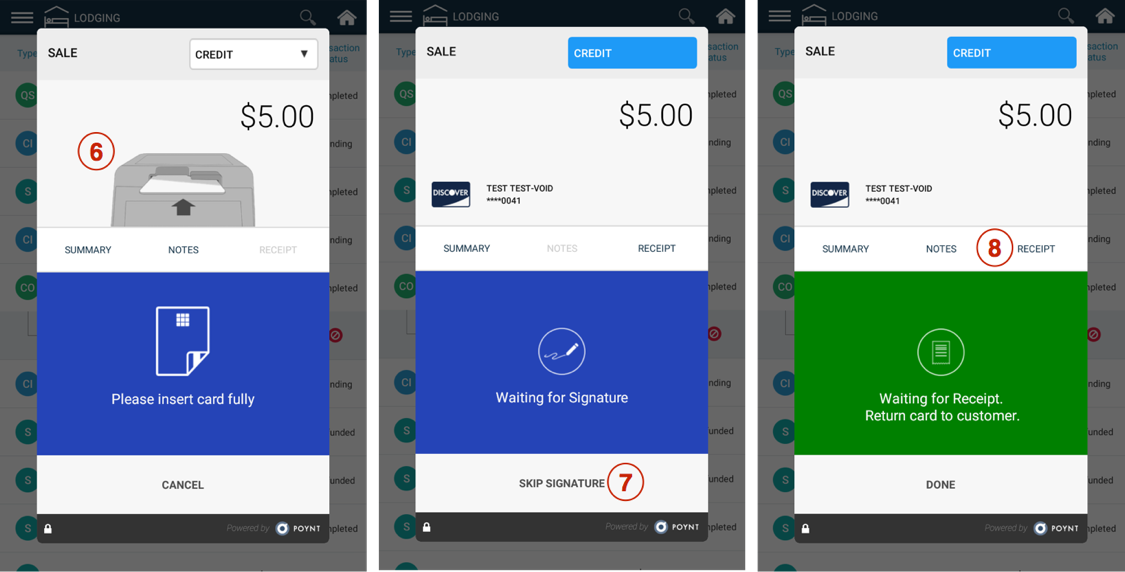
Step 6: Insert / Swipe Card or Tap NFC for Payment. Wait for the card authorization.
Step 7: Wait for the customer signature on the customer screen.
Option: You can also choose to skip this step and obtain signature on the printed receipt. Tap ‘Skip Signature’ to proceed to Receipt screen.
Step 8: Wait for customer receipt selection (email, paper, none or text).
Option: You can also print out a receipt by tapping on the ‘Receipt’ tab.
Step 9: When the Add Charges (Sale) transaction is completed, you will see the Sale Details in both the Details List and the pop-up details for that Stay: